Users
Looking for end-user support?
This area is for Super Administrators and others interested in the overall management of WordPress sites and networks that we host.
>> Search our end-user support documentation here.
Below is our documentation on creating and managing user accounts which is intended for Super Admin users.
Table of Contents
Creating Usernames
Below is an overview of all the different options for creating usernames.
If you are using one of our authentication options the users will be created as LDAP, Google Apps, or Shibboleth users depending on which authentication option you are using. These types of users are referred to as SSO users.The exception is Users > Add New in site admin and network admin dashboard which will create accounts as a local user. Local users are accounts whose password are managed inside WordPress. A local user can’t log in as an SSO user.
Add New
Use Users > Add New in the dashboard of a site when you need to add a few new or existing users to a site, one at a time.
For more information refer to Add New support documentation.
Add Student Users
My Class > Add Student Users is used to bulk create student usernames when My Class is set up on the site.
To use My Class the Classes plugin must be network activated in Plugins > Plugin Management the network admin dashboard and My Class needs to be set up on the class blog.
For more information refer to Add Student Users support documentation.
Add Users
If you have LDAP enabled on your network the Users > Add New menu item is replaced with Users > Add Users.
You need to select Yes for “Allow blog admins to add users” and “Allow blog admins to bulk add” in Settings > LDAP Options > General Settings in the network admin if you want admin users to add LDAP users using Users > Add Users.
Batch Create
Batch create allows super admin users to quickly create usernames by uploading a CSV file to Sites > Batch Create in the network admin dashboard.
For more information, refer to Batch Create support documentation.
Site & User Creator
The Site & User Creator function is used to bulk create, add new or existing users to a site. If you are using one of our authentication options the users will be created as LDAP, Google Apps, or Shibboleth users, depending on which authentication option you are using.
Site & User Creator is disabled on all new CampusPress networks. Enable access by going to Settings > Site & User Creator in the network admin dashboard as follows:
1. Go to Settings > Site & User Creator in the network admin dashboard.
2. Select which components you want to enable and who can use.
Enable options:
- Yes – all admin users can use the component
- Super Admin only – only a super admin user can use the component and sees this option.
- No – component is disabled.
3. Click Save Changes.
Sign up page
Users can also create their own usernames if you have enabled your sign up page under Allow New Registrations in Network Settings.
Auto Create
Whenever possible, we recommend using a method to tie into your existing user accounts such as LDAP, Google Apps, or Shibboleth.
If you use one of these options you can set up user accounts to auto create the first time a new user logs into your CampusPress network using their school username and password.
Managing Users
Users in the Network Admin dashboard is used by the Super Admin user to manage existing users.
The most common reasons why a super admin uses Users > All Users are to:
- Manually reset a password or change an email address attached to a username.
- Confirm the username attached to an email address.
- Identify blogs attached to a username.
- Grant a super admin privileges to a user.
Finding Users
You locate the user as follows:
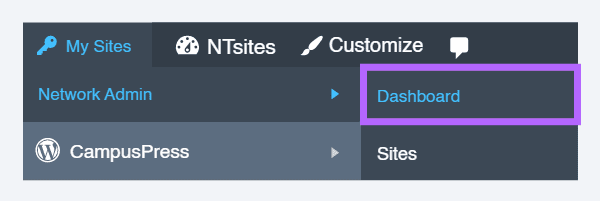
1. Go to the Network Admin dashboard.

2. Locate the user by searching the person’s username or email address using ‘Search User‘ on the Right Now module.
- If you are unsure of the exact spelling of a username you can add an asterisk to the end of your search term to locate all usernames that include the search term.
You have a range of options once the required user is located:
Mark as Spam
Used when you find a spam user but aren’t completely sure they are a spammer so you mark them as spam.
You can mark it as “not spam” if it turns out to be legit. When you spam a username, it spams all blogs attached to that username.
Edit

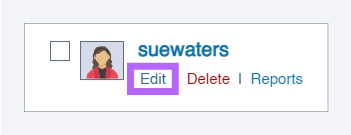
When you click on the Edit action link it takes you to the Edit User panel for that user where you can view and edit the users details.
You use the Edit User page to edit features like:
- Enabling and disabling the Admin Bar
- Change the display name of a user
- Grant a user super admin privileges for the Network
- Change the email address attached to a username
- Manually reset the password of a user
Below are the main areas on the Edit user page you use as a super admin user:
Grant user super admin privileges
Used to grant a user super admin privileges on your network. Remember to use caution when deciding who to grant super admin privileges to as mistakes made by a Super Admin user can have a significant impact on your network.
Change Display name
The display name is displayed on all posts and comments a user publishes if they have set a display name. For example, my username is suewaters and my display name is Sue Waters. When I log into my account I log in as suewaters and the name Sue Waters is displayed on any posts or comment I publish.
It is easier to set up a display name than to change a username.
Change email address
The email address associated with a username is used for password resets and for comment notification emails. Comment moderation emails are sent to the blog admin address listed in Settings > General.
Reset Password
You use this to reset a user’s password as follows:
1. Click on Generate Password.
5. The password reset window loads with an automatically generated password.
You can either use this automatically generated password or replace it with your own password.
The automatically generated password from above has been replaced with own password in the example below.
- If the password is too weak you will be asked to confirm the use of weak password.
- Using a combination of letters, numbers and symbols makes it hard for others to guess your password.
- The strength indicator provides an indication of how good your password choice is!
4. Click Update User.
Managing users in the site admin dashboard
You can also use Users > All Users in the dashboard of a site to:
- Manually reset a password or change an email address attached to a username.
- Confirm the username attached to an email address.
- Change a user’s role on a site.
- Remove a user from a site.
Reset user password
User passwords are managed by your single-sign-on system if you are using one of our authentication options, such as LDAP, Google Apps, or Shibboleth. These types of users are referred to as SSO users. Local users are accounts whose password are managed inside WordPress.
For security reasons local user passwords are encrypted and can’t be viewed by any one. Forgotten passwords needs to be reset by the user using the lost password link or can be manually reset by a super admin user on CampusPress network.
You reset a user’s password of a local user as a super admin user as follows:
1. Go to the Network Admin dashboard.

2. Locate the user by searching the person’s username or email address using ‘Search User‘ on the Right Now module.
- If you are unsure of the exact spelling of a username you can add an asterisk to the end of your search term to locate all usernames that include the search term.
3. Click on Edit link underneath their username.

4. Click on Generate Password.
5. The password reset window loads with an automatically generated password.
You can either use this automatically generated password or replace it with your own password.
The automatically generated password from above has been replaced with own password in the example below.
- If the password is too weak you will be asked to confirm the use of weak password.
- Using a combination of letters, numbers and symbols makes it hard for others to guess your password.
- The strength indicator provides an indication of how good your password choice is!
6. Click Update User.
Email addresses can be changed by the user or can be changed by a super admin user.
Change email address
You change a user’s email address as a super admin user as follows:
1. Go to the Network Admin dashboard.

2. Locate the user by searching the person’s username or email address using ‘Search User‘ on the Right Now module.
- If you are unsure of the exact spelling of a username you can add an asterisk to the end of your search term to locate all usernames that include the search term.
3. Click on Edit link underneath their username.

4. Scroll down to email under contact info.
5. Add the new email address.
6. Click Update User at the bottom of the page.
You can also use the edit link under a username in Users > All Users in the dashboard of a blog to change a user’s email address.
Email tips
If the email doesn’t change when you click Update User this means it is probably associated with another username. Each e-mail address is a unique identifier for a username and only one email address can only be associated with a username.
You can check if an email address is attached to an existing username by searching the email address using ‘Search User‘ on the Right Now module in the network admin dashboard.
If the email address is already being used with another username you’ll need to change the email address attached to the existing username to an alternative email address.
The email address associated with a username is used for password resets and for comment notification emails. Comment moderation emails are sent to the site admin address listed in Settings > General.
User Switching
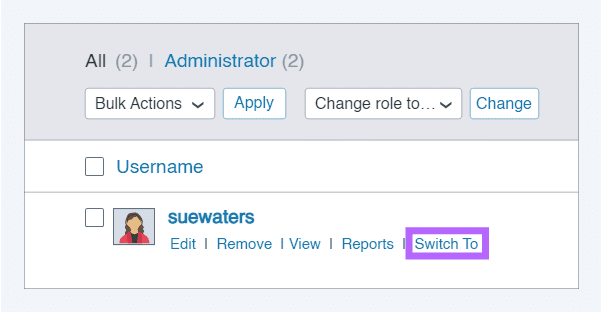
User switching allows a super admin user to switch to any other user account using the Switch To action link underneath a person’s username in Users > All Users in the dashboard of a site. This is handy for troubleshooting user account issues and uploading another user’s avatar.
Only a logged in super admin user sees the option to Switch To.

Once you’ve finished you click on the Switch back link in the dashboard of the site or in your profile menu in the admin bar.

Go to Plugin management in the network admin dashboard and click on network activate next to User switching If you don’t see the option to Switch To underneath a person’s username.
Show Display Names
Show display names is used to lists the display names of all users in Users > All Users in site admin dashboard which can be used for searching by a person’s display name. This is helpful on networks that use alphanumeric usernames as it allows an admin user to search by display name in Users > All Users in the dashboard of their site.
You need to network activate Show display names in Plugin management in the network admin dashboard to use and can set the display name for new users when processing a batch create file by adding their display name to a new column after the user role.