Getting Started
Looking for end-user support?
This area is for Super Administrators and others interested in the overall management of WordPress sites and networks that we host.
>> Search our end-user support documentation here.
Below is the support documentation to help support teams set up their CampusPress networks.
Table of Contents
The Super Admin User
The Super Admin user is the person who manages your CampusPress network.
A super admin user can:
- Manage the access and level of responsibility of all users on all sites on your network.
- Manage network and site features, including access to plugins, themes, and visibility settings.
- Create new users and new sites.
- Edit posts, pages, and comments on any site without being added as a user to the site.
- Reset passwords and update user profile details.
- Access the Network Admin dashboard.
You can also assign staff the Support Super Admin role. The support super admin user role has limited network admin access and is only able to access the Sites and Users menu items in the network admin dashboard. This role is used for staff members who will be supporting users but who do not need the ability to make changes related to network settings, plugins, and themes.
Send an email to contact@campuspress.com if you want to assign the role of support super admin user to any users on your network.
Other User Roles
The other user roles are:
- Administrator
- Editor
- Author
- Contributor
- Subscriber
The role you assign to a user is based on how much access you want them to have to a site.
The Administrator has the highest access to the site users and can publish/edit posts and pages, change settings, and change the theme. A subscriber has the lowest access and is only able to access the site dashboard to change their user profile. The subscriber role is used on sites set to “only registered users of this site can view it” or if you want to limit comments to logged-in users.
On group sites, you would typically assign the administrator role to a few key users to prevent the theme and settings from being changed and assign all other users to the role of editor, author, or contributor – based on whether you want them to be able to publish/edit posts and pages.
Learn more about user roles here.
Choosing your Super Admin User(s)
The Super Admin user has complete control of your entire CampusPress network.
Deciding how many users you assign as Super Admin users should be carefully considered since Super Admin users have the highest access to the network settings and are able to make changes that affect the entire network.
You can also assign staff the Support Super Admin role. The support super admin user role has limited network admin access and is only able to access the Sites and Users menu items in the network admin dashboard. This role is used for staff members who will be supporting users but who do not need the ability to make changes related to network settings, plugins, and themes.
About the network admin dashboard
The “Network Admin” dashboard is a separate dashboard area for all Network Management on your CampusPress network.
The link is only viewable and accessible to users who have been granted Super Admin privileges on your CampusPress network.
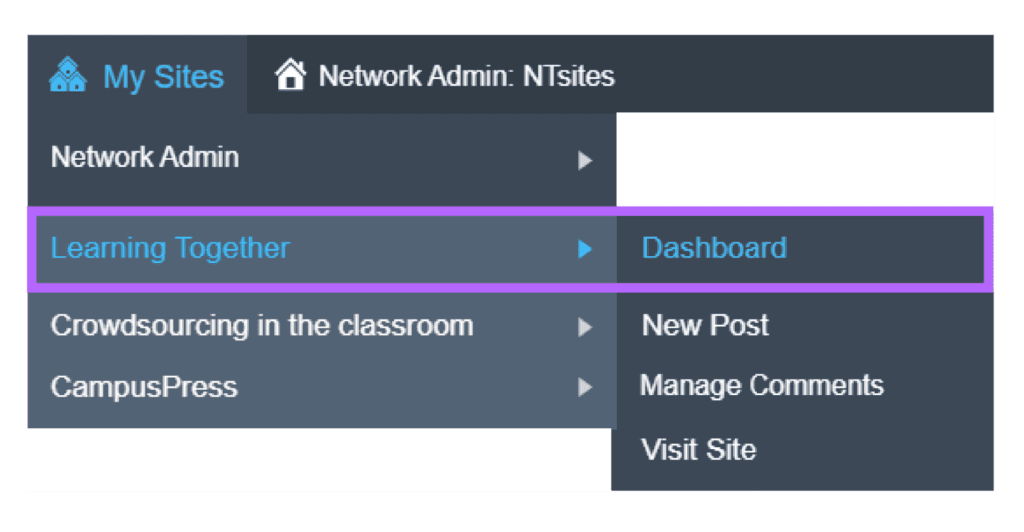
You access the “Network Admin” link via the My Sites drop-down menu on your admin bar.
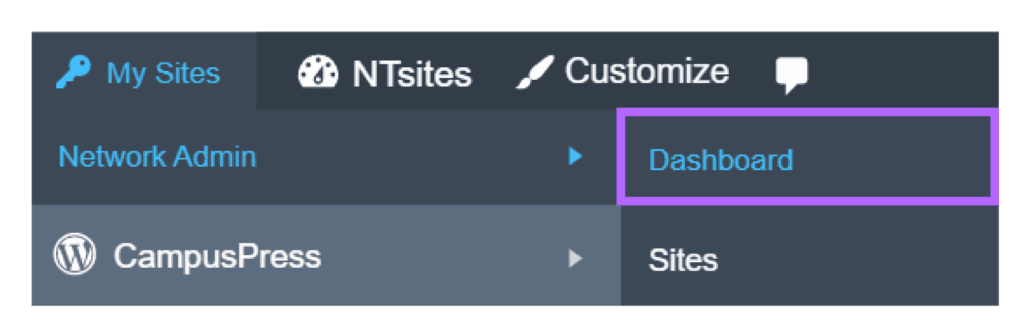
Once in the Network Admin dashboard, you can quickly change back to the “Site Admin” Dashboard, by clicking on the dashboard link to any of your sites under My Sites.
Super Admin Access
You grant super admin access to a user as follows:
1. Go to the Network Admin dashboard.

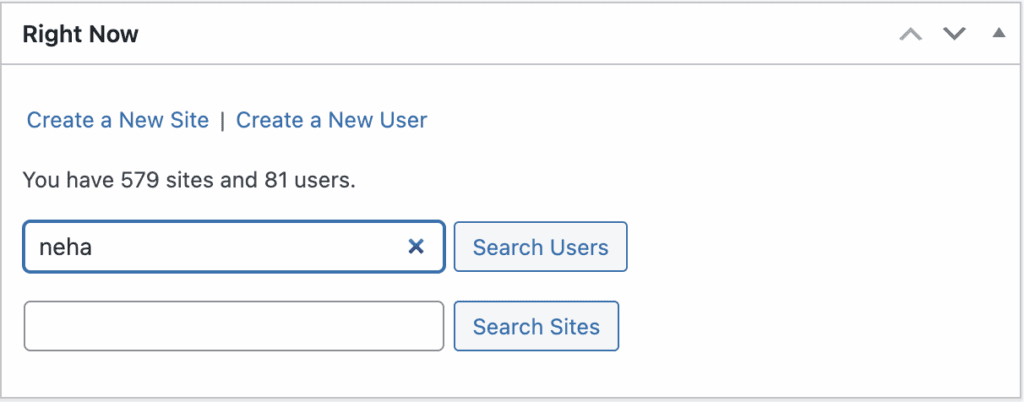
2. Locate the user by searching the person’s username or email address using ‘Search User‘ on the Right Now module.
- If you are unsure of the exact spelling of a username, you can add an asterisk to the end of your search term to locate all usernames that include the search term.
3. Click on the Edit link under the person’s username.
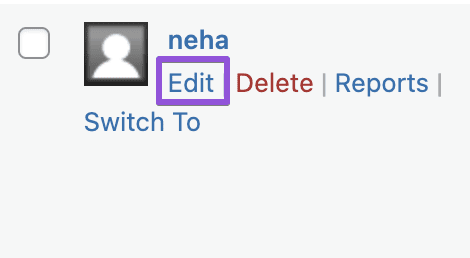
4. Select the checkbox next to ‘Grant this user super admin privileges for the Network.’

5. Scroll to the bottom of the page and click Update User.
Network Settings
The Settings area in the Network Admin dashboard is where you can configure your network title, network admin email, the emails sent to users, your network language, and the default theme used on newly created sites.
You configure your network settings as follows:
1. Go to Settings > Network Settings in the network admin dashboard.

2. Once you have made your changes, click Save Changes at the bottom of the page.
Network Title

Network title is where you can change your Network Name.
The Network Name is automatically added to Welcome Email, Welcome User Email, and First Post for newly created users and sites if you keep the variable SITE_NAME in the New Site Settings for the Welcome Email, Welcome User Email and First Post.
You change the Site Title and tagline displayed on the main site of your network via Settings > General in the Site Admin dashboard of the main blog (learn more here).
Network Admin Email

The Network Admin email is sent an email if someone registers a new site or user account if ‘Send the network admin an email notification every time someone registers a site or user account’ is enabled.
Welcome Email

The Welcome email is sent to users once they have activated their new site.
You can customize this email to provide more information about your Campus network while also providing your users with resources to help them use your network.
Welcome User Email
The Welcome user email is sent to new users once they have activated their username.
Like the Welcome email, this email can be customized to provide more information about your CampusPress network while also providing your users with resources to help them use their site.
First Post
The “Hello World” post is the default post that appears on all newly created sites.
Default Language
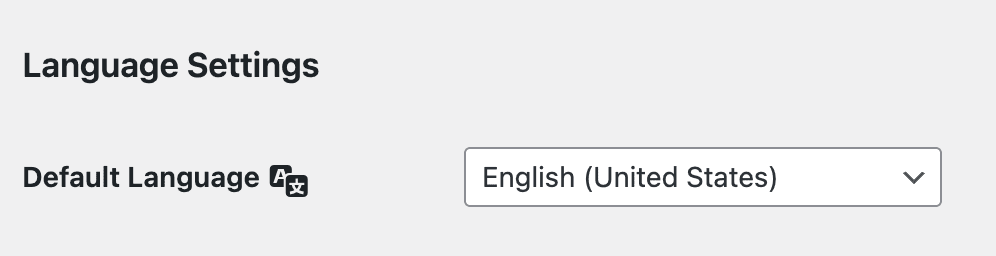
The default language is used to change the language across your CampusPress network. This is the language is displayed inside the dashboards of all sites network-wide and on the login screen.
Your admin users can override your default language setting in Settings > General in their site dashboard (read more here).
Default theme
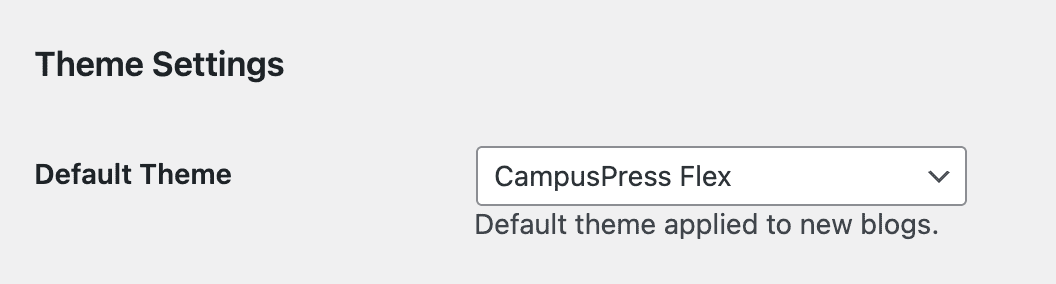
The default theme controls what theme is used on all newly created sites. You use this option to change it to your preferred theme.
The alternative option is to set up a New blog template and set it as the default template. The New Blog Templates tool allows Super Admins to set up blog templates that can be used for creating other blogs that are almost an exact copy of the template blog.
Using blog templates, you can ensure all newly created sites have the same appearance, header image, categories, widgets, plugins, and your own customized content in posts, pages, and comments.
Editor Settings
By default, the ‘Classic Editor’ is network-activated.
You can control which editor is enabled for all users, and if site admin users are able to switch between editors, in Settings > Network Settings under Editor Settings.

When Allow site admins to change settings is selected, users can switch back and forth between the ‘classic editor’ and the new ‘block editor’ in Settings > Writing in the dashboard of their site.

Registration options
By default, registration on new CampusPress networks is set to “Both sites and user accounts can be registered,” and registration is limited to your educational email domain.
This means new users and sites can be registered through your sign-up page at example.com/signup/, provided the registration is made using an approved email domain.
“Sorry, that email address is not allowed!” message displays if the email domain hasn’t been added to the allowed email domain list.
Email contact@campuspress.com with your CampusPress URL and information on changes needed if you would like to:
- Change registration options
- Add other email domains or remove limited email registration.
- Disable notification of new registrations to the network admin email address.
Registration can be changed to any of the following options:
- Registration is disabled – New users can’t create their own usernames or sites. All usernames and sites must be created using Blog & User Creator, My Class, Batch Create, by a Super admin user or using one of our authentication options such as LDAP, Google Apps, or Shibboleth.
- User accounts may be registered – New users can create their usernames using your signup page but sites need to be created using Blog & User Creator, My Class, Batch Create or by the Super admin user.
- Logged-in users may register new sites – logged-in users can create new sites using your signup page using the “Add New” link in Dashboard > My Sites.
- Both sites and user accounts can be registered – usernames and sites can be created using your signup page.
If you are using one of our authentication options such as LDAP, Google Apps, or Shibboleth you would normally use “Registration is disabled” or “Logged in users may register new sites” and set your authentication to auto-create usernames the first time a new user logs in with their educational username and password.
Email contact@campuspress.com with your CampusPress URL if you need your registration option changed.
Limited Email Registration
If registration is set to “User accounts may be registered” or “Both sites and user accounts can be registered” only educational email domains are allowed to ensure only those who are part of your community are able to create a site or username.
gmail.com and other web-based emails aren’t allowed when registration is open as these are common email domains used by people who create sites to promote products and websites.
All email domains are allowed if you are using either “Registration is disabled” or “Logged in users may register new sites”.
Site Visibility
Site visibility controls the visibility settings on all sites across your CampusPress network.
By Default, visibility is set to ‘Allow all visitors to all sites” and ‘Allow sites administrators to modify visibility settings for their sites’.
You can change the visibility on sites in Settings > Site Visibility in the network admin dashboard.
Visibility Options Access

By default, users see an option to change their site visibility in Settings > Reading.
Selecting ‘Remove “Allow search engines to index this site’ when “Allow access” is selected removes “Allow search engines from indexing this site” in the visibility option list on Settings > Reading. You would use this option if you wanted to prevent admin users from changing their sites to “Allow search engines to index this site.”

Below is what it looks like when “Allow search engines from indexing this site” is removed. Allow search engines is hidden from the admin users but is still visible to a super admin user.
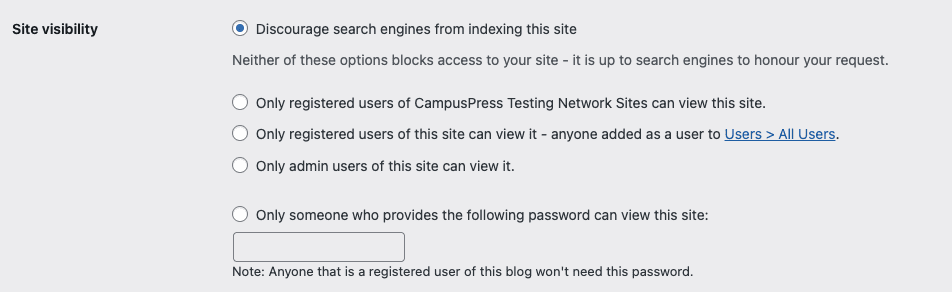
Changing to Block access hides all visibility options from admin users except “Discourage search engines from indexing the site” from the list in Settings > Reading. All visibility options are visible to super admin users.
Show visibility option at Sign up

By default, users see an option to select their site visibility when creating their site using your sign-up page located at example.com/signup/. Select No if you don’t want users to set their site visibility when creating their new site.
Site administrators can change their site visibility any time in Settings > Reading unless you’ve selected No for ‘Allow Override’.
Learn more about changing site visibility in Settings > Reading here. Visibility on student sites is controlled using My Class > Settings if you are using My Class and can’t be changed in Settings > Reading.
Available Options

By default, your users will see all visibility site options on your sign-up page and in Settings > Reading as well as ‘Allow search engines to index this site’ and ‘Discourage search engines from indexing this site’ and these options allow them to choose their own site visibility.
Normally you would keep all available options selected options and not adjust the available options settings.
Default Settings

By default, visibility is set to “Allow all visitors to all sites”. This means any new sites created using the Blog & User Creator, Batch Create, or one of our authentication options, such as LDAP, Google Apps, or Shibboleth, are automatically created as “Allow all visitors to all sites.”
Site visibility can be changed to any of the default settings.
Contact CampusPress support at contact@campuspress.com if you need help changing your default visibility settings.
Branding and logos
On the CampusPress network, you have complete control over all aspects of branding – logos, links, and more.
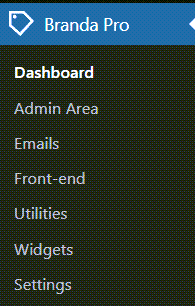
All changes and customizations are made by going to Branda Pro in the network admin dashboard. (Refer to Branda Pro documentation for a more comprehensive overview).
Here’s an overview of how you can use branding:
Images
You can use the Image options to replace:
Here is what the default login image and favicon look like on newly installed campus sites:

Here are examples of Campus networks using their institution logos on the login page:

And their own favicons.

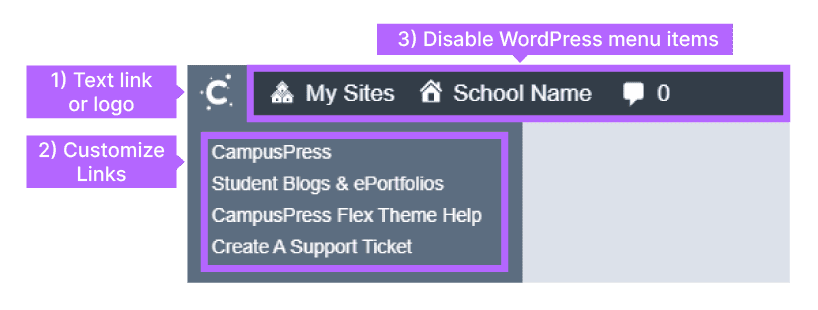
The admin bar options allow you to:
- Change the default Edublogs logo to a text link or logo for your institution.
- Change and customize the links to suit your needs.
- Control which menu items are displayed in the admin bar on your blogs.
Here’s what the default admin bar looks like on all newly installed campus networks:
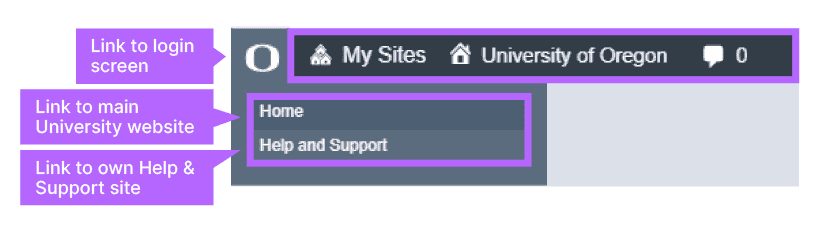
And here is a customized admin bar on a Campus network:
The Widget options are used to:
- Control which “Default WordPress Dashboard Widgets” are shown to bloggers.
- Rebrand the meta widget.
- Hide the dashboard welcome module.
We’ve set it up with a minimal number of default WordPress dashboard widgets, the dashboard welcome module hidden and the meta widget rebranded to ensure an easy-to-use blogging experience for your users.
The Footer content option can be used to add:
- Copyright or other information to the footers of all blogs.
- Footer information to the dashboard of every blog on your network
- Tracking code that you’d like included for analytic or other purposes
For advanced uses – replaces code found in the HTML source with your network name instead of the default “WordPress” information.
This lets you change certain text in the dashboard and replace it with a word of your choice.
For example, you can replace all occurrences of the word ‘Edublogs’ with ‘University Blogs’.
The Admin help content is used to disable the default WordPress help drop-down and replace it with the Help information you want your users to see. The default WordPress help drop-down can overwhelm users because it has links to more information on Codex and the WordPress Support Forum.
Here’s what the default WordPress help drop-down looks like on Posts > All Posts page:

Allows you to add Custom CSS to the header of every admin page for every site or the header of the login page for every site.
Refer to the full Branda Pro Documentation for a comprehensive overview of each section.