
Creating a course blog is an easy and effective way to enhance the learning experience for both you and your students. A well-run course blog can boost transparency and engagement, foster collaboration and creativity, and help improve communication and development.
In this post, we’ll explore what course blogs are, highlight their key benefits, and walk you through seven simple steps to get started with your own.
Continue reading, or jump ahead using these links:
- An Introduction to Course Blogs
- Why You Should Consider Developing a Course Blog
- How to Start a Course Blog (In 7 Simple Steps)
- Step 1: Decide the Purpose of Your Course Blog
- Step 2: Choose a Blogging Platform and Create Your Website
- Step 3: Configure Your Privacy and User Settings
- Step 4: Customize the Design and Appearance of Your Course Blog
- Step 5: Personalize Your Blog’s Pages
- Step 6: Configure Your Blog’s Post Settings
- Step 7: Make It Easy for Students to Access and Connect to the Blog
An Introduction to Course Blogs
It’s hard to define what a course blog is because, ultimately, it can be whatever you want it to be. The ease of setting up a blog and the versatility of the platform is one of the main draws of using blogs in the classroom.
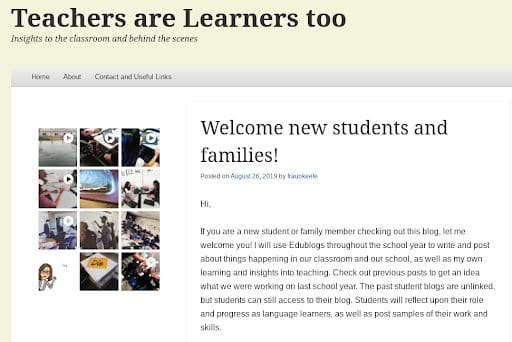
A popular use of blogs in the classroom is as a communication tool to keep students, parents, and other faculty informed about classroom happenings. This might include school news, classroom events, or course updates:
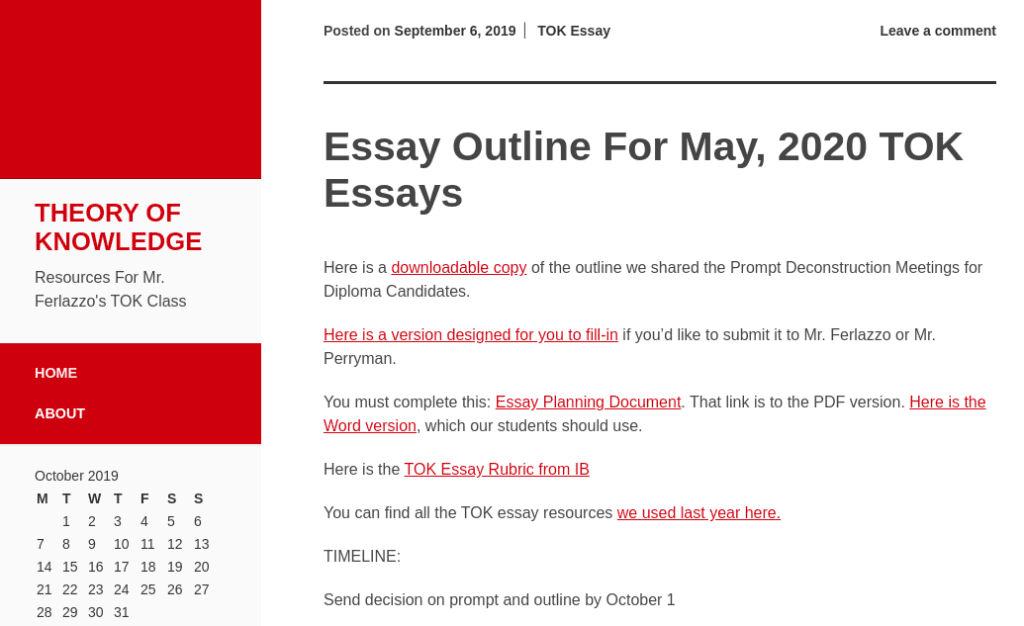
Some blogs are more specific and may function as a digital archive for course materials that students can use for reference throughout the year.
These could include syllabi, assignment outlines, resource links, and blogs posts that expand on lessons covered in class:
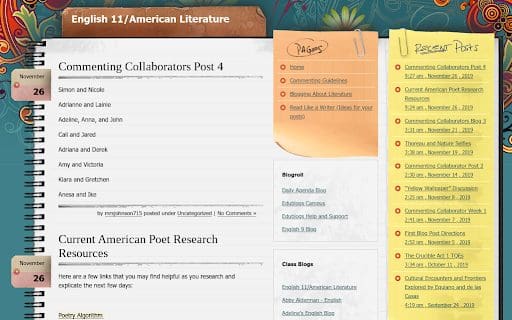
Using a course blog for student blogging is one of the most popular uses and the one that benefits students the most. Many course blogs allow, or insist, that students contribute their own posts to the blog and participate in discussions:
To better understand how a blog can help create an enriching educational experience, let’s look beyond what they are used for and explore why to use one.
Why You Should Consider Developing a Course Blog
There are myriad benefits to starting a course blog that are worth considering. However, we’re going to narrow it down to highlight the main advantages.
A classroom blog lets you provide your students with a platform to exchange ideas and participate in thought-provoking discussions. You might find that some students tend to be quiet in the classroom, but are more comfortable opening up and sharing their ideas virtually.
It can also help them gain experience and skills to aid in their personal and professional development. Blogging can improve their reading and writing skills, as well as their ability to effectively communicate and collaborate online. It even helps teach them about digital citizenship.
Plus, a blog can be more engaging and interactive than traditional, text-based learning materials. Students can play with multimedia forms such as video, images, and links.
While enhancing your students’ education may be reward enough, there are other ways a course blog can benefit you as well. For example, you can enjoy a more organized and personalized digital space separate from the school’s main school website.
How to Start a Course Blog (In 7 Simple Steps)
If you’re interested in starting a blog for your course, it is easy to get started. Here are seven simple steps to creating your own class blog.
Step 1: Decide the Purpose of Your Course Blog
The first thing you’ll want to do is spend some time thinking about what you want to use the course blog for. Deciding on the purpose of the blog will make completing the subsequent steps easier because you’ll know which settings and tools to use to serve your purpose.
Some helpful questions you might consider asking include:
- Who is the audience (students, parents, or both)?
- How will it be used (new and updates, distribute and collect assignments, student blogging, etc.)?
- Will you want students to contribute to the blog and, if so, in what capacity (creating their own blogs or commenting on posts)?
- What are the course objectives and can these objectives be enhanced or better accomplished using a class or student blogging platform?
- Does my school have and existing rules or preferences about how course blogs are used?
Step 2: Choose a Blogging Platform and Create Your Website
Once you have a better understanding of what you want to use the course blog for, you can begin the creation process. The blogging platform you choose is important because it influences usability.
WordPress is the preferred blogging platform for many educators. It’s the most popular Content Management System (CMS) available, and it is incredibly intuitive and easy to use.
You’ll also need a hosting solution. Here at CampusPress, we offer fully-managed WordPress hosting solutions for educational institutions.
To create a single class website or a small group of student blogs, we recommend using Edublogs. This blogging platform is designed to make it as easy as possible for teachers to get set up quickly and it is free to get started.
To begin, head to Edublogs.com and sign up for an account:
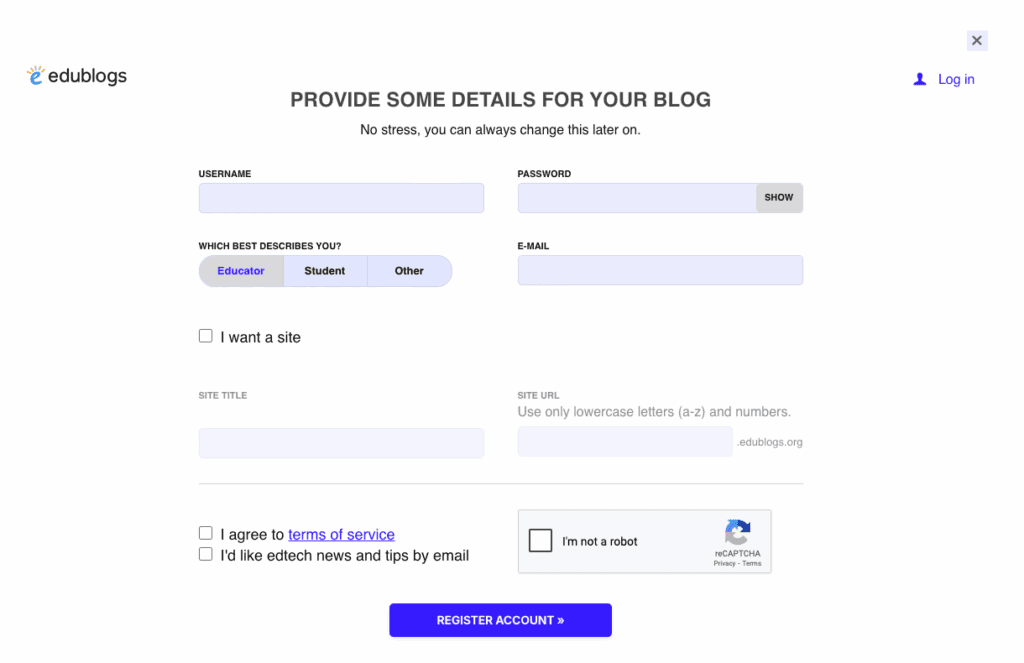
There, you’ll choose a blog title and URL. While you can always change the title of your blog, you can’t change the URL (not without creating a new blog, anyway). Therefore, you want to give it some thought.
Ideally, the URL will be the same if not similar to the title. It doesn’t need to be anything fancy. Sometimes simple is better. For example, you can use your name such as “Mr. Smith’s Class Blog.”
Once you’re done filling out this information, click on the Create A Blog button. It will bring you to the dashboard of your new WordPress blog.
Step 3: Configure Your Privacy and User Settings
Once you’re in the back end of WordPress, the first thing you’ll want to do is configure your privacy and user settings. This is important because it influences who will be able to access and view the blog.
By making it viewable to the public, anyone can read the blog. Some educators may prefer this, as it gives your students an audience.
On the other hand, you may feel more comfortable restricting it to only students (and perhaps their parents). If so, you can make it private.
To tweak the privacy settings, go to Settings > Reading in the left-side navigation bar of your WordPress dashboard:
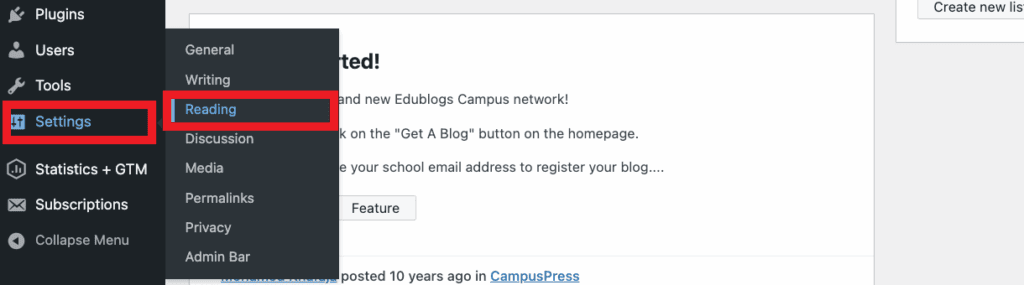
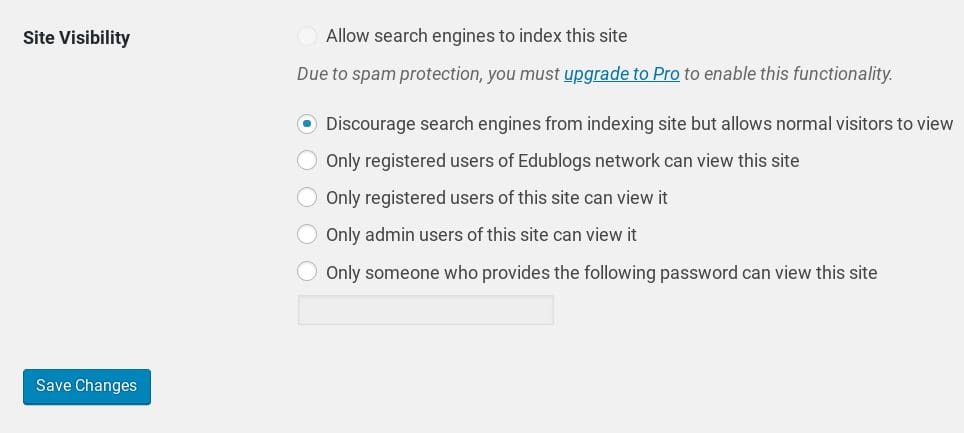
On this page, you can configure the site’s visibility settings.
Under Settings, you can also click on the General, Writing and Discussion links to further customize the user and site settings. This includes:
- Changing the avatar
- Configuring comment moderation and permissions
- Default article settings
If you’re using Edublogs, you’ll notice a My Class section on your dashboard too. With the Create a Class feature, you can designate your blog as a Class Blog giving you the opportunity you create Student Blogs that will be attached to your class blog and use a set of privacy and moderation permissions that you control in My Class > Settings.
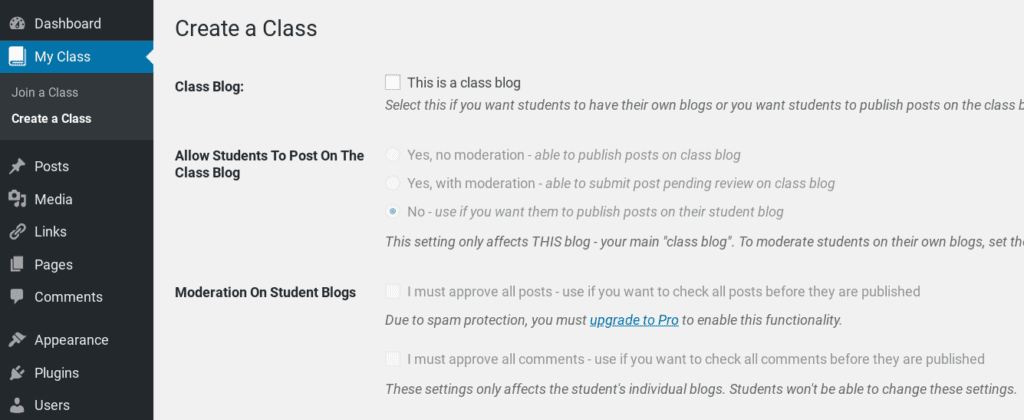
This is an example of why choosing a blogging platform designed specifically for educators can come in handy. By upgrading to Edublogs Pro, you’ll unlock access to a wide range of helpful, easy-to-use features to improve your course blog.
Step 4: Customize the Design and Appearance of Your Course Blog
Once you have the privacy and permissions squared away, you can start customizing the design of your blog. There are many different ways you can do this, including:
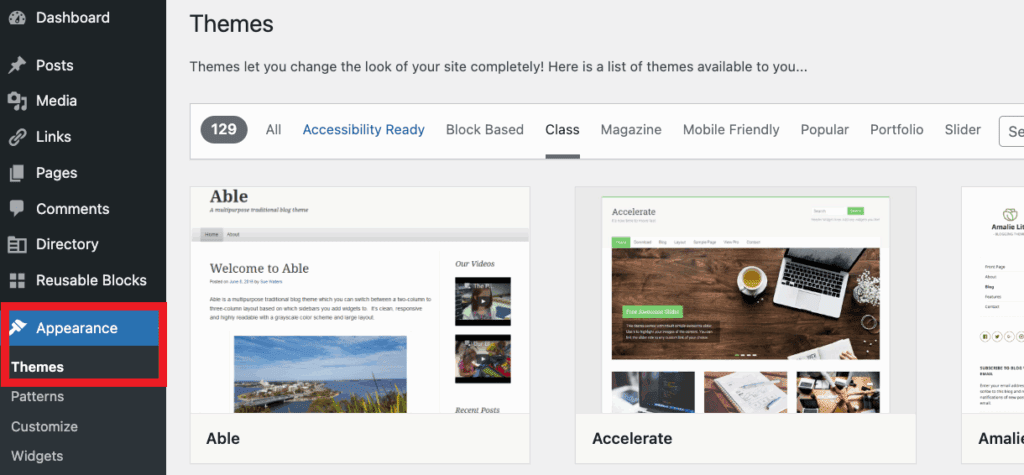
The theme plays the most important role in the appearance of your blog. On Edublogs, there are plenty of free WordPress themes to choose from, which you can view by going to Appearance > Themes:
Again, sometimes simple is best. You can always go back and change the design and appearance settings whenever you want.
Step 5: Personalize Your Blog’s Pages
Your pages will be used for content on your blog that you don’t plan on updating frequently. For example, you can use a page for:
- About Me content
- Blog guidelines
- Contact information
Pages shouldn’t be confused for posts. Consider pages as more permanent parts of the blog, whereas posts are better suited for time-considerate situations when you want your students to contribute or engage.
To create a page, you can go to Pages > Add New:
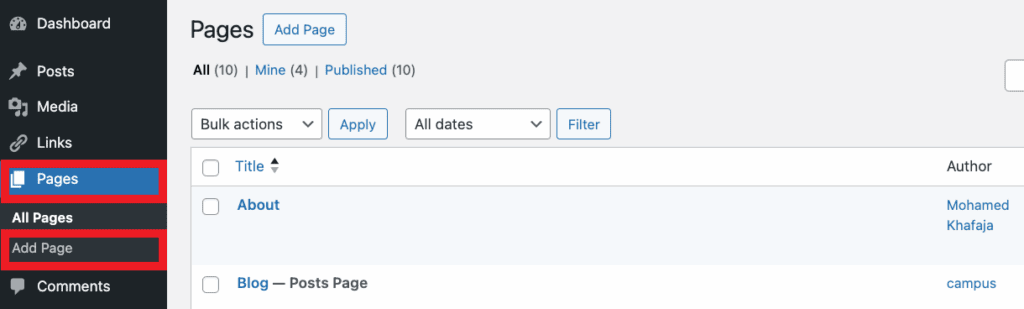
The main elements to fill out are the page title and the page content. In the content box, you can add images, videos, text, links, etc. When you’re done, click on the Publish button in the right sidebar.
Step 6: Configure Your Blog’s Post Settings
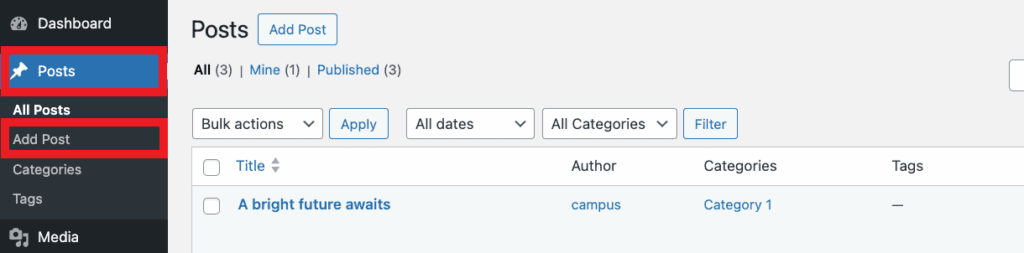
There’s a wide range of things you might create a post for like showcasing student work, updating classroom information, adding alerts about new assignments, etc. When you’re ready to add a post, you can do so by going to Posts > Add New Post:
When adding posts, you can assign categories and tags to posts. Categories and tags are useful for organizing blog content by topics so that users can quickly find specific posts.
Step 7: Make It Easy for Students to Access and Connect to the Blog
After you have your blog set up, it’s important to make sure students can easily access and connect to it. You might consider adding a link to it in your email signature as well as on the school website directory.
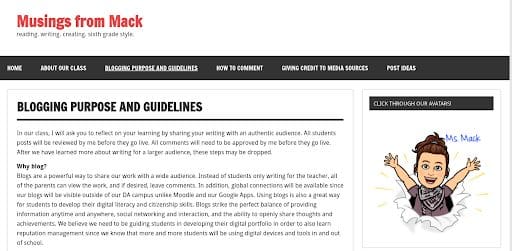
It’s also a smart idea to include information about the blog and how to use it in the course syllabus. In addition to explaining what the blog will be used for, consider creating clear instructions and guidelines for students:
How you use the course blog will influence what information and instructions students and parents will need regarding logging into and using the blog.
Conclusion
There are many ways to use a class blog and even more ways to set them up. If you are new to blogging, the process can seem overwhelming but whether your goal is to create a simple communication tool or to create a tool for student blogging and collaboration, using the steps above can help you get started quickly.
If you have any questions about starting a course blog for your class or for your entire school, please get in touch!