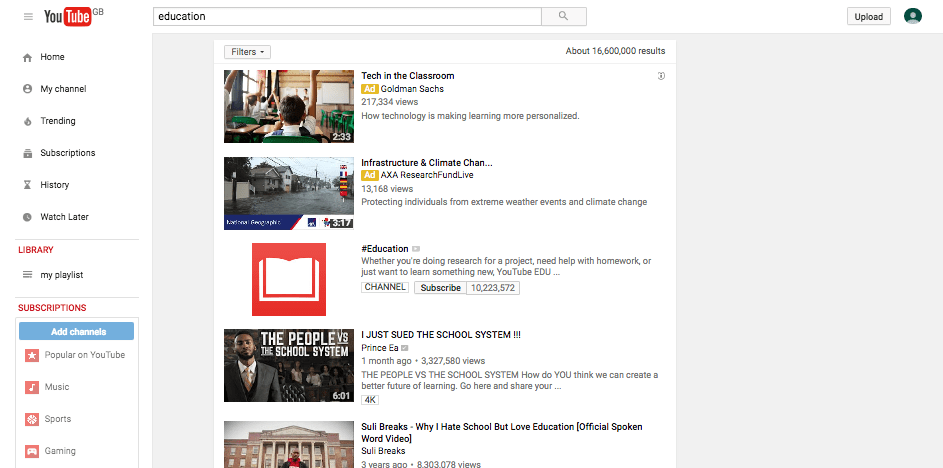
What’s your preferred way of learning online? Do you go straight to YouTube like my two young sons? Or do you preferring doing a traditional Google search and skimming text and diagrams?
Maybe I’m too impatient — I want to skim some text and get right to the bit I need. They want to enjoy a video in full even if most of it isn’t about the thing they searched for in the first place. It could be a reflection on the amount of time we have available, or on their patience, or maybe just on what each of us is used to.
Whatever the case, many kids (and adults) love to use YouTube to learn.
There’s no escaping the irresistible allure of video for young learners.
So how can you harness that allure in the classroom? And how can you use video when communicating online with your students and the wider community? In this post, I explain how you can use video to enhance learning and improve your school website.
Continue reading, or jump ahead using these links:
- The Benefits of Video for Learning
- Enhancing Your School Or Teacher Website with Video
- How to Incorporate Video in Your Website
- Printable Instructions: Embed a YouTube Video on Your Blog or Website
- Making the Most of Video is Simpler Than You Think
The Benefits of Video for Learning
First let’s take a look at how video can enhance learning both in the classroom and outside it. Educators have been using video to enhance learning for as long as television has been available. Who can forget the joy of seeing the TV wheeled into your classroom on a trolley?
Using video as part of teaching gives learners the opportunity to see places and concepts that it would be difficult to access in the classroom or even on field trips. Students learning about other cultures, world geography, or astronomy will be able to watch images of places you couldn’t possibly take them to. They’ll have access to animations, demonstrations, and simulations that might be difficult or expensive to set up yourself, for example when learning about mechanics or biology. And students of literature or drama can watch dramatizations of texts that you’re studying in class, often bringing it to life in a way that’s difficult to do otherwise.
Of course, video isn’t a panacea — it has to be supported by other teaching methods including analysis of what’s been watched, asking for learners’ reactions and putting what they’ve watched in context. But used well, it can be a valuable tool both in and out of the classroom. The “flipped classroom” model often involves students watching educational videos as homework, freeing up class time for deeper work.
Which brings me to the other way in which video can help with learning: by encouraging students to make or appear in their own videos. Whether it’s screencasts, stop motion, explainer videos, animations, or more, students can learn a lot through the process of video creation. You might like to check out our guide on The Edublogger about video creation for teachers and students.
Video is certainly a great tool for learning. But it’s also part of your arsenal when it comes to using the school website to communicate with parents and other stakeholders.
Enhancing Your School Or Teacher Website with Video
What happens to the video you create or use in class? It probably stays on a recording device somewhere, if it’s video you’ve created, or maybe gets uploaded to the school network. If it’s a video you’ve watched or set as homework, it’s probably forgotten about afterwards.
But if you use your school website to showcase the video you’re creating, using, and watching, that can add an extra dimension to your site. It can provide students, parents, and other stakeholders with an insight into what students are learning.
If you’re using third party video it’s important to check that you have permission to reproduce it: YouTube has a standard set of rights for the vast majority of its videos that allows you to embed those videos on your own site. And if you created the video in class you won’t have copyright problems but you will need to check with students or their parents that you’ve got permission to put video of them on the school website. Get this in writing for photos and video at the beginning of each school year.
If you’re creating your own video it’s a good idea to set up a YouTube channel and then stream your video from that, instead of uploading it directly to your website. This saves server space and ensures that anyone visiting the site will be able to watch the video, no matter what device they’re using. It also gives you an additional way for people to find your video and your website, via YouTube. Need help with uploading your videos to a third party service and embedding on your site? This guide will help.
YouTube playlists will help you categorize your videos and point students to the ones they need to watch. You can also add someone else’s video to your own playlist in YouTube. This means you can create curated lists of videos for students that they can access directly on YouTube or you can stream via your school’s site. So your playlists can include a mix of your own videos and other ones you’ve found on YouTube.
How to Incorporate Videos in Your Website
We’ve established that video is a good thing, for learning and for your website. Now I’m going to show you how to set up a YouTube channel, add videos to it, and stream these via your website. I’ll also show you how to add playlists for your own and third-party videos.
Creating a YouTube Account
If your school doesn’t already have a YouTube account, the first step is to set one up. You may choose to have one account for the whole school or institution, or you may choose to create accounts for each faculty. If you do have an account for the whole institution, you can use playlists to separate faculties or subject areas, or you can create multiple channels using one single account.
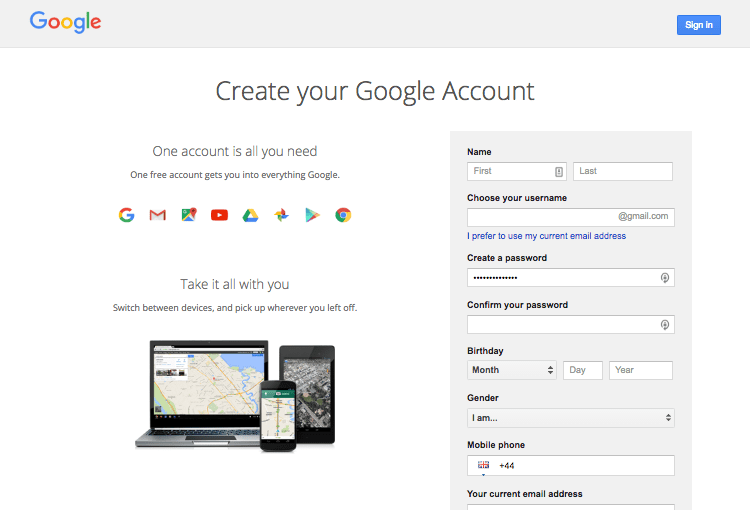
To use YouTube, you’ll need a Google account. If you don’t already have one, setting one up is free — got to the Google sign up page and follow the instructions.
💡 Tip: Don’t use your personal Google account for setting up your YouTube channel; use or create a school account.
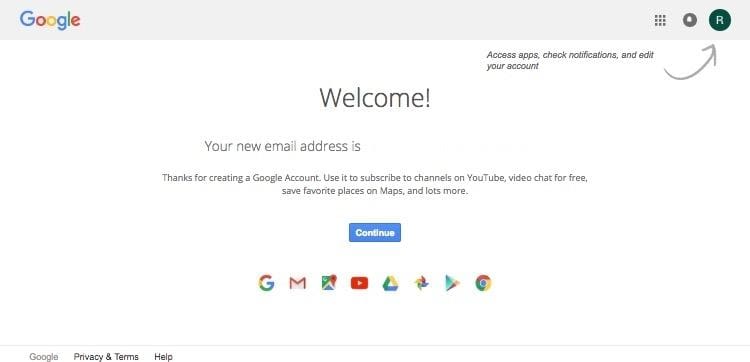
Once you’ve created your account, you’ll see a confirmation screen with your new Gmail address:
Click on the Continue button to configure your security and privacy settings. Now click on the grid of squares in the top right-hand corner to access a list of all the Google services available to you:
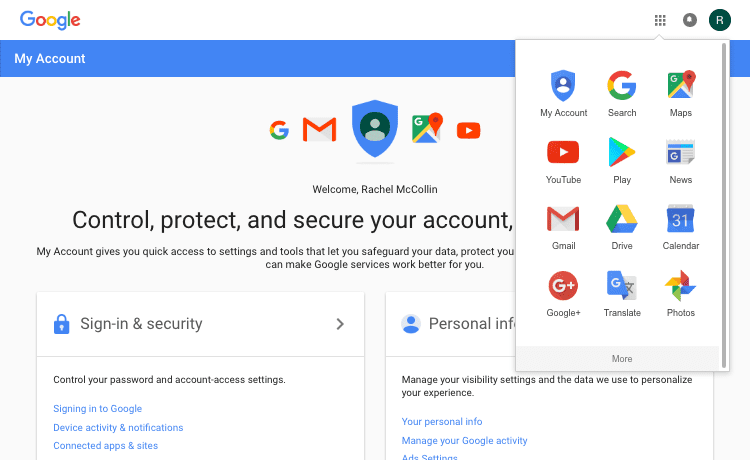
Click on the YouTube icon (the red play button) to access YouTube. Click the Sign In button on the top right: your Gmail account will be linked to a YouTube account and you’ll be ready to go:
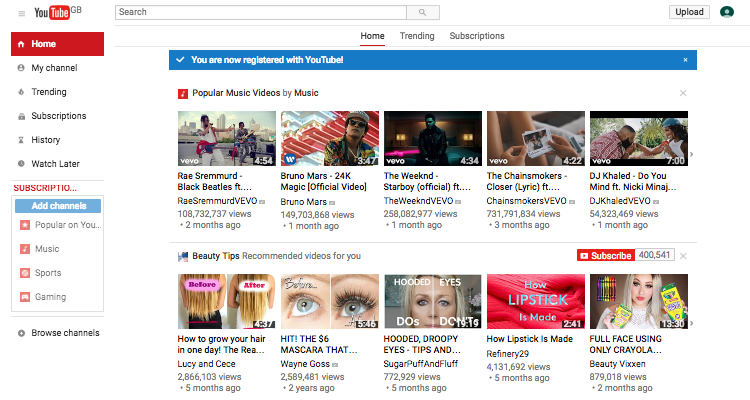
Setting Up Your Channel
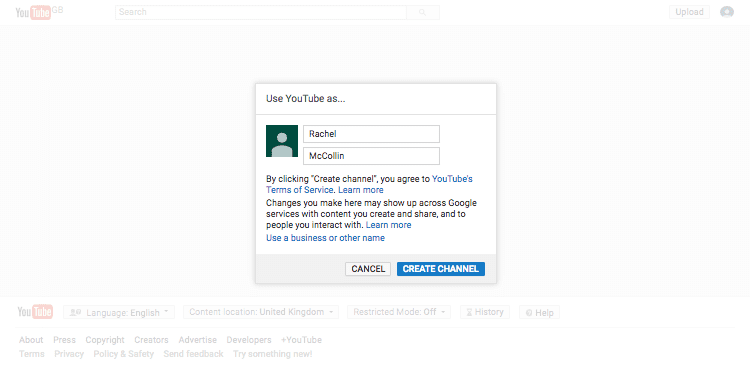
Next, you’ll need to set up your channel. Click in the Your Channel link in the left-hand menu in YouTube. You’ll be prompted to enter the name of your channel:
Now you’ll see your channel:
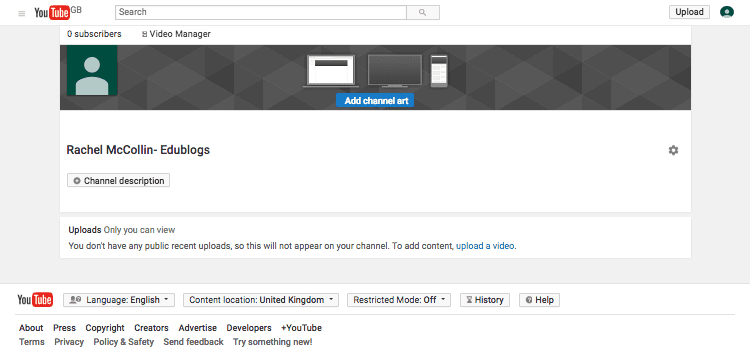
Spend some time adding channel art (images) and a description. Want to create your own graphics for your banner? Canva is a free tool that’s extremely popular for graphic design. Check out our guide to using Canva on The Edublogger.
Uploading Video
You have two options for uploading video to YouTube:
- Via the YouTube website.
- By connecting your video editing software or recording device to your YouTube account.
Which you choose to do will depend on your workflow. You’ll find that most video recording and editing software lets you link directly to YouTube and export your video straight from the software to your YouTube channel. This includes iPhones and iPads if you’re using those to record video.
I won’t cover that in detail here as it will depend on your software. Not sure what software to use to create videos? We outline 7 of the most popular free choices in this guide on The Edublogger.
Let’s take a look at how to upload a video via the YouTube website.
Uploading a video is very simple. Just click the Upload a Video link on your channel screen, or the Upload button in the top right corner of all YouTube screens when you’re logged in:
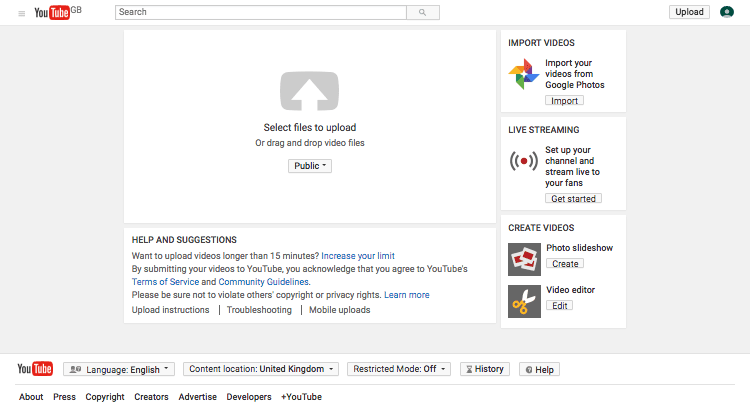
You have a few options:
- Uploading video from your computer
- Importing video from Google Photos
- Creating a live stream
- Creating a photo slideshow
- Editing video
Let’s start by uploading a video. Click the button in the middle of the upload pane and select the video file you want to upload from your computer. YouTube will then start uploading the video and provide you with a screen where you can edit the video’s information:
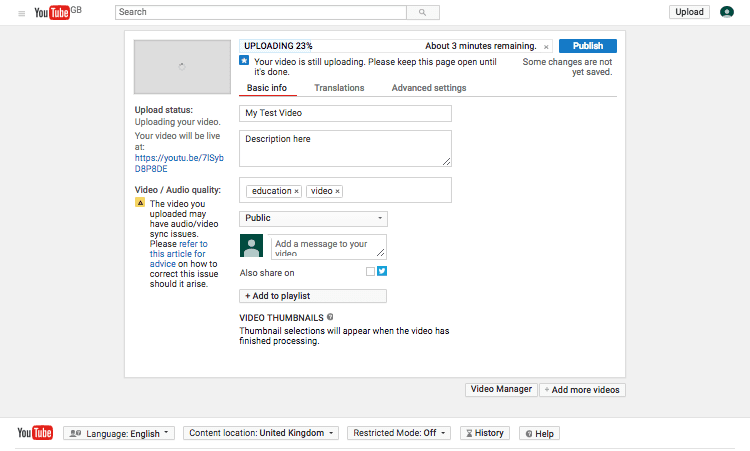
Once the video has uploaded you’ll see a few stills from it at the bottom of the screen: choose the best one to act as your thumbnail. Then click the Publish button at the top right.
And that’s it! Here’s my published video:
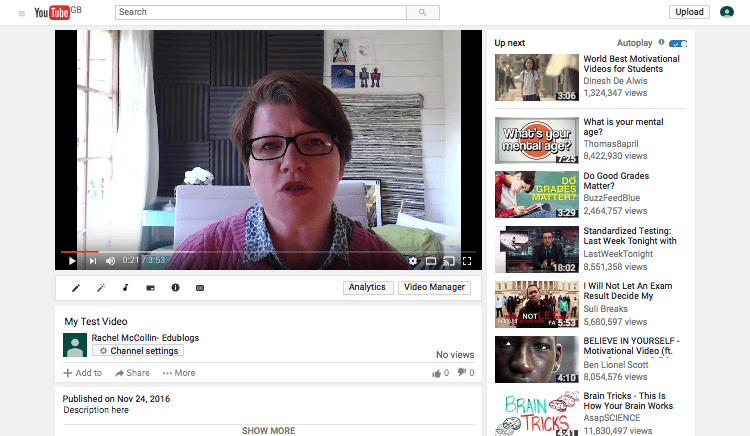
Creating a Playlist and Adding Video to It
You can create a playlist for the video as you upload it by clicking the Add to playlist button in the upload screen. This gives you the option to create a new playlist, and once you’ve got playlists, it’ll let you add your video to an existing one:
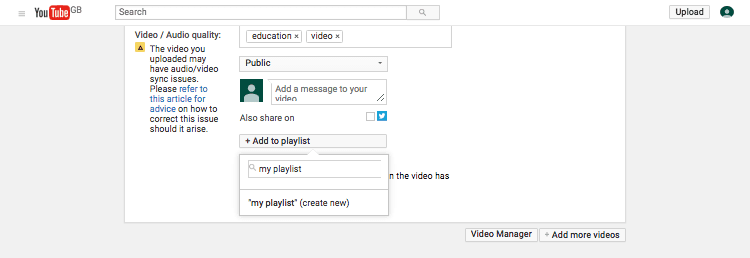
When you’ve typed in the playlist’s name, click the Create button to create it.
Alternatively, once your video is live you can click the Add to button below the video in its playback screen, to add it to one or more of your playlists:
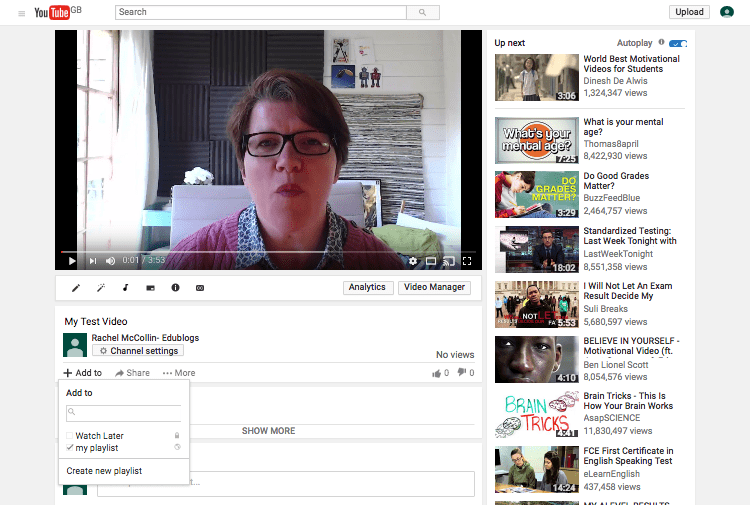
You can also add a new playlist from here. You can add a single video to as many playlists as you want — so for example you could have playlists of videos for each year group and subject.
You can also add any existing YouTube video to one of your playlists in exactly the same way, helping students to find videos on YouTube that will support their learning.
Embedding Your Video on Your Website
The final step is to embed your video in your Edublogs, CampusPress, or WordPress site. You’ll be pleased to know that this is very easy to do.
Open the page or post where you want the video. Put your cursor on a new line where you want the video to display.
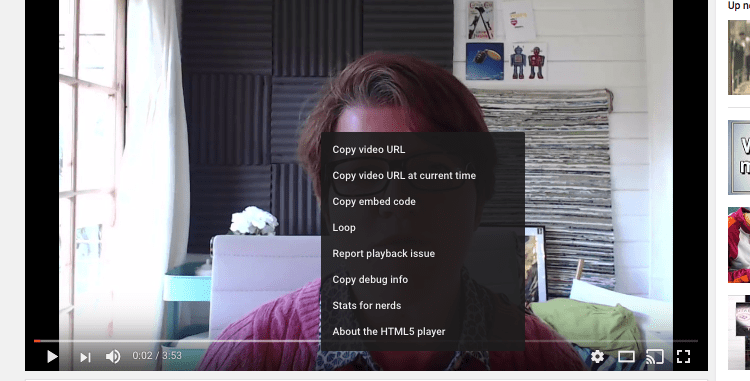
Now go back to your YouTube video and copy its URL. You can do this by right-clicking on the video and selecting Copy video URL:
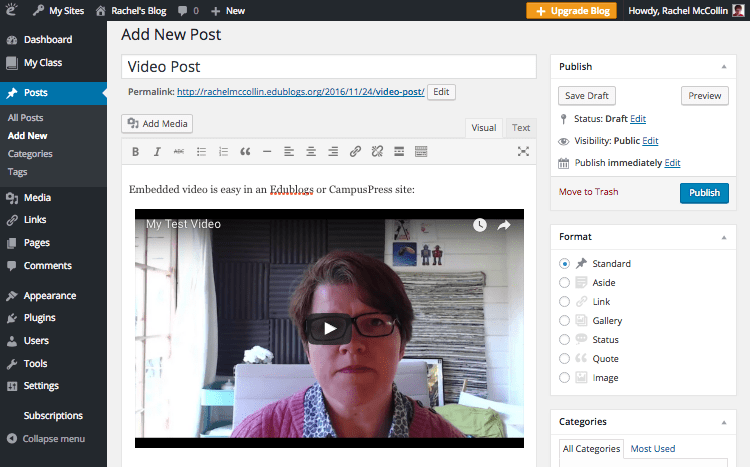
Then go back to your post and paste that URL into the post. Your copied text will immediately disappear and be replaced by the video:
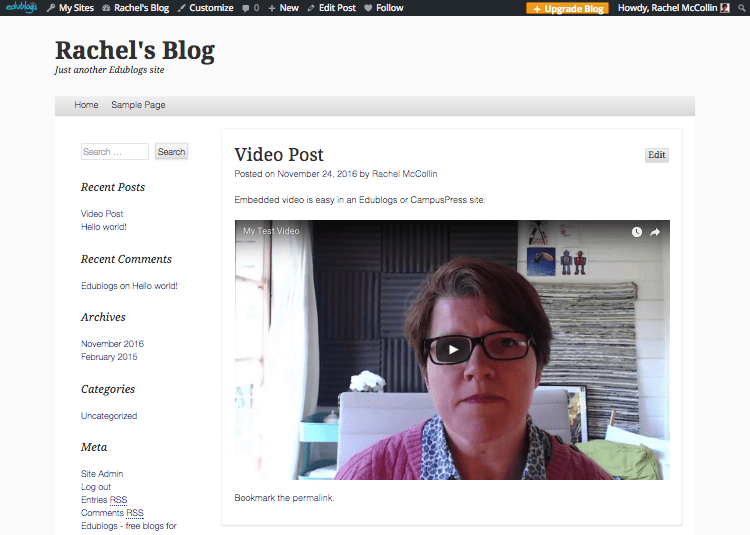
Publish or update your post or page in the normal way and you’ll see that the video is embedded into the live post so that anyone can watch it or go to YouTube to do so:
You can add as many videos to each page or post as you like, so you could create a page for a class and add a number of videos for them. Or you might find it easier to add a category for each class, subject or year group, and group your video posts that way.
Printable Instructions: Embed a YouTube Video on Your Blog or Website
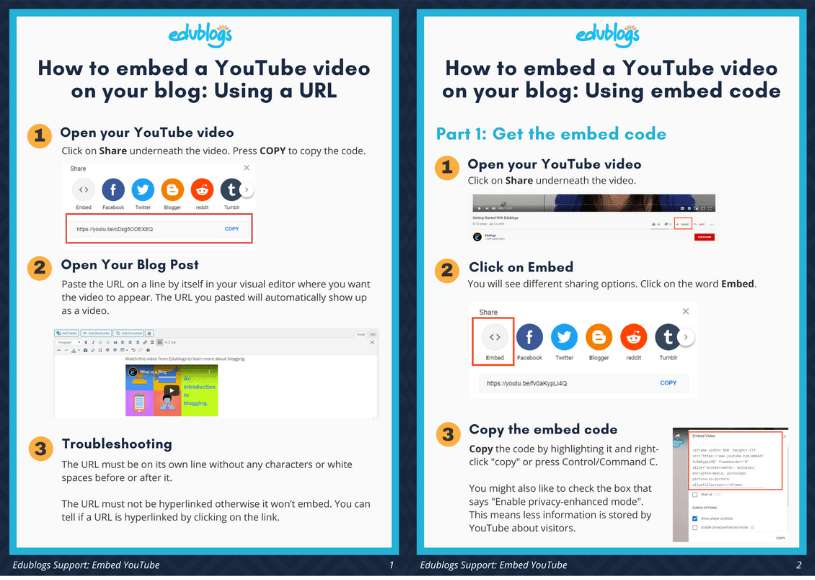
Videos from video sharing services like YouTube can be embedded into posts or pages by either using:
- The video URL: Paste the URL on a line by itself in your post/page editor where you want the video to appear. This is the method we walked through in the above example.
- The embed code: Find the embed code on the site you’re using (e.g. YouTube) and copy it. Then in your post put your cursor where you want the video. Click on Add Media and then Insert Embed Code. Paste the code and press Insert into post. Note: embedding isn’t available on free blogs to prevent misuse from spammers.
You can find the full instructions on how to embed videos in this Help Guide or check out the PDF below for detailed instructions for YouTube.
📌 Download the PDF of the embedding instructions.
Making the Most of Video is Simpler Than You Think
As you can see, creating a YouTube channel, uploading a video to it, and embedding that on your school website isn’t difficult.
You’ll find that if you’re using a device like an iPhone or iPad to create videos, you can upload your video directly to YouTube. And adding that to your site is just a matter of copying the URL. It will give you an easy way for students to find the video that links to your curriculum and for parents to see what’s been happening in the classroom.
Good luck!
Don’t currently have a class blog or school website?
Learn more about how CampusPress can help.
>> Learn more about our school websites
