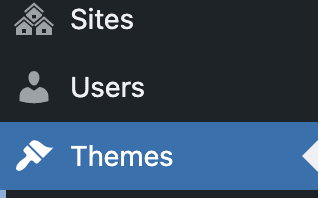
Themes
Looking for end-user support?
This area is for Super Administrators and others interested in the overall management of WordPress sites and networks that we host.
>> Search our end-user support documentation here.
We provide hundreds of themes – all mobile responsive and user-friendly.
You can preview themes in our CampusPress theme showcase by clicking on Live Preview on a theme thumbnail. Not all theme features can be presented in our theme showcase, and some look better once configured.
Contact us for a demo network or trial.
Below is our documentation on how to manage themes intended for Super Admin users.
Themes can be enabled on a per-site basis or network-enabled so all admin users can access them in Appearance > Themes.
Table of Contents
Network Enable Theme
Any theme that has been network-enabled in Themes in the network admin dashboard is listed in Appearance > Themes in the dashboard of all sites across your CampusPress network.
You network enable themes as follows:
1. Go to Themes in the network admin dashboard.
2. Select the themes you want to Network Enable

3. Select Network Enable from the Bulk Actions drop-down menu.

4. Click Apply.
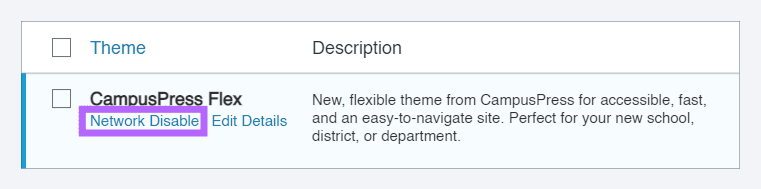
Network Disable Theme
Any theme that has been network disabled in Themes in the network admin dashboard won’t be listed in Appearance > Themes in the dashboard of all sites across your CampusPress network and can’t be activated by your admin users.
You network disable themes as follows:
1. Go to Themes in the network admin dashboard.

2. Click on Network Disable under the theme you want disabled.
Enable Theme on a Per Site basis
Occasionally, you may want to enable a theme on specific sites only and you do this as follows:
1. Locate the site by searching the blog URL using ‘Search Sites‘ on the Right Now module in network admin.

2. Click on the URL.
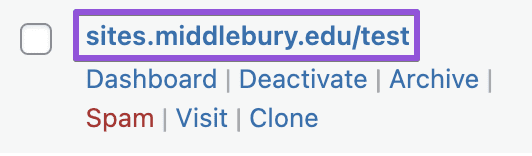
3. Click on the Themes tab on the Edit Site page.
4. Click on Enable underneath the theme you want to enable.

Please note:
- The Edit Site page should only be used for enabling themes on a site or changing email addresses in Settings.
- It should never be used for changing the Site URL.
Adding Custom Themes
Themes developed by our team or included in our curated and approved list (Common Plugins/Themes) undergo a comprehensive code review to check for known vulnerabilities. These themes are maintained by our team.
For custom theme requests, our team also performs a detailed code review to check for known vulnerabilities
Note that the ability to add custom themes is contingent on your CampusPress plan. Please email contact@campuspress.com to verify if this option is included in your plan.
Important:
- We do not test custom themes for compatibility with other themes or plugins used on our server setup.
- Our team does not maintain, update, or troubleshoot issues caused by custom themes, especially after updates.
- If a vulnerability is identified, we will provide feedback on any necessary fixes required by our team.
For additional information on our code guidelines and how to submit custom themes and plugins, refer to our Submitting Themes and Requesting Plugins guide.