Log in message / terms of service / admin bar
Looking for end-user support?
This area is for Super Administrators and others interested in the overall management of WordPress sites and networks that we host.
>> Search our end-user support documentation here.
We have built many tools on top of WordPress that are available to our users.
Below is our documentation on how to use the tools that are intended for Super Admin users.
Table of Contents
Log in Message
Log in message is used to add a login message or disable password resets on the WordPress login page (wp-login.php).
To use you first need to network activate Log In Message as follows:
1. Go to Plugins > Plugin Management in the network admin dashboard
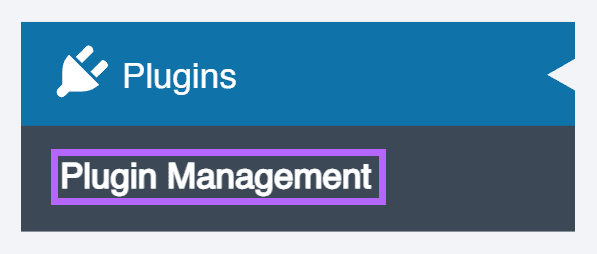
2. Click on Network Activate next to Log In Messages.

3. Now go to Settings > Network Settings in the network admin dashboard.
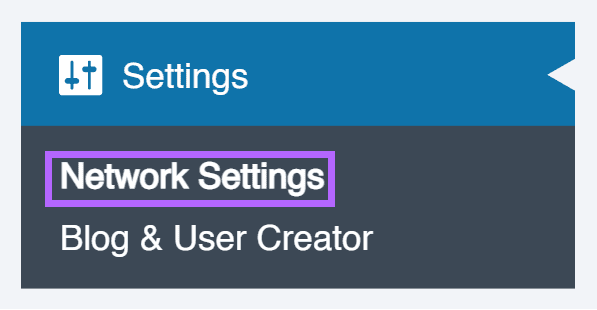
4. Scroll down to Log In Mod Settings, add your message to the Login Message or Login Footer message field, select if you want to disable password reset or add a password reset not allowed message and click Save Changes.

Below is what this message looks like on the login page.

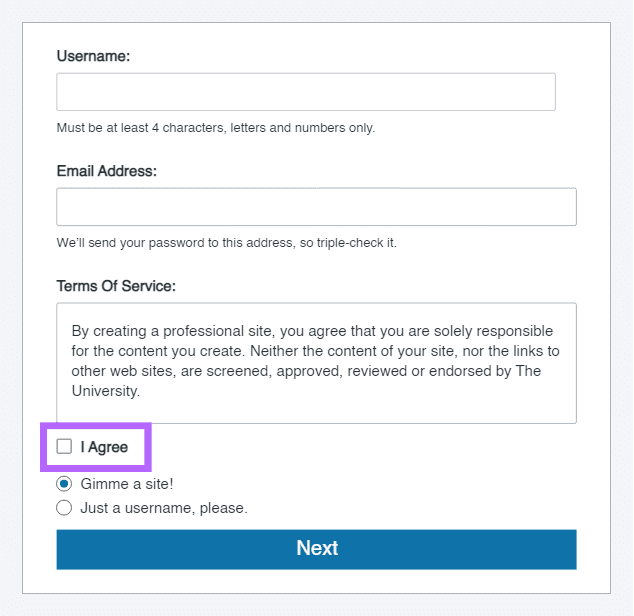
Terms of Service
You add a terms of service to the WordPress sign up page (wp-signup.php) as follows:
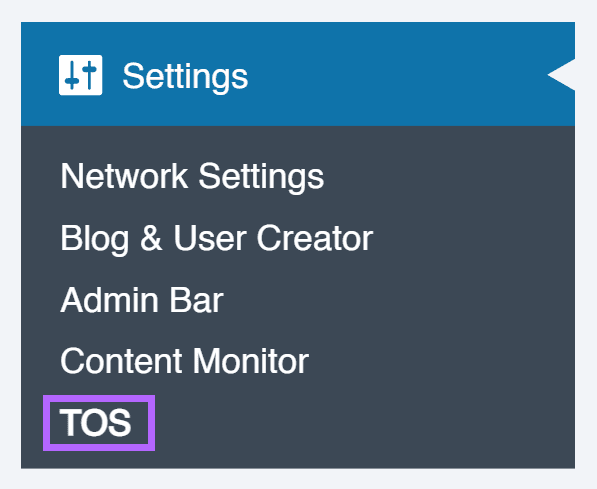
1. Go to Settings > TOS in the network admin dashboard.
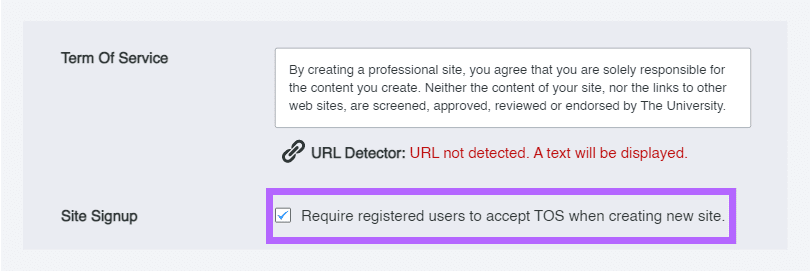
2. Add your text to the Terms of Service field or the URL to your Terms of Service page and select “Require registered users to accept TOS when creating new site.” and click Save Changes.
3. Your terms of service displays on your WordPress sign up page (wp-signup.php) and all users must agree to the terms to create a site (or a username).
Admin Bar
Admin bar settings in the network admin dashboard is used to control who sees the admin bar on all sites across your entire CampusPress network.
By default the admin bar is enabled for all logged in and logged out users and can be changed as follows:
1. Go to Settings > Admin Bar in the network admin dashboard.
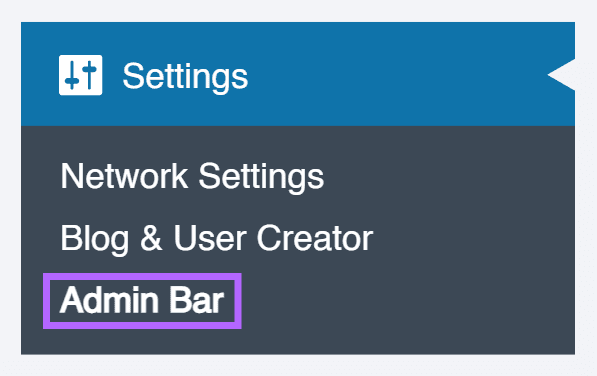
2. Select your preferred options and click Save Changes.

Users can control the admin bar settings on their own site in Settings > Admin bar in their site dashboard.