LMS Integration
Looking for end-user support?
This area is for Super Administrators and others interested in the overall management of WordPress sites and networks that we host.
>> Search our end-user support documentation here.
The LMS Integration plugin allows your users to connect their sites with their LMS course(s). Users are able to log in via their LMS course to their CampusPress site provided their username or email address match their LMS credentials.
Table of Contents
Activate LMS Integration
To setup the LMS Integration you will first need to either network activate the plugin or activate it only on your main network site (i.e. sites.school.edu). This will enable the LTI integration settings in the Network Admin Dashboard for a super admin to configure.
The difference between these two options are:
- Option 1: Network activating the LMS Integration plugin activates LTI integration on all sites. Send an email to contact@campuspress.com if you want the plugin network activated as our team needs to assist with this.
- Option 2: Activating the LMS Integration plugin on your main site such as sites.school.edu will allow the plugin to activated on a site-by-site basis. This allows you to set the LMS Integration plugin to All Users or Super Admin users only in Plugin Management based on your user preference.
Configure Canvas
Once the plugin is activated on your network you need to set up LMS Integration as follows:
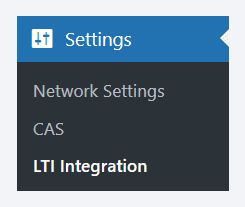
1. Go to Settings > LTI Integration in the network admin dashboard.

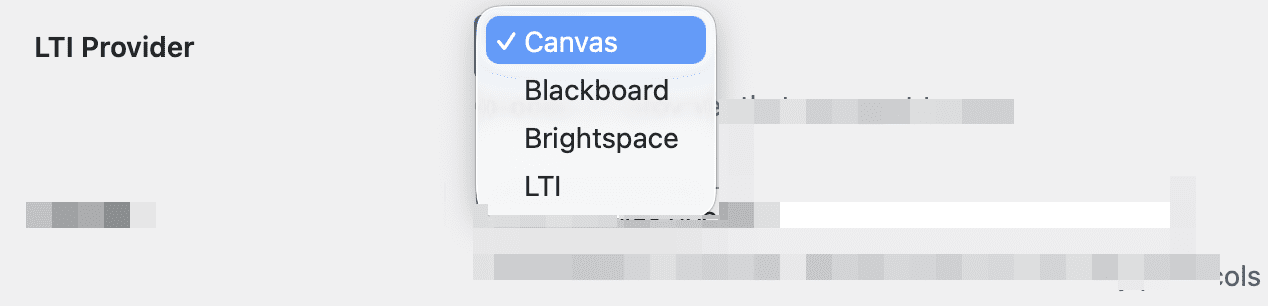
2. Under LTI Provider section, select Canvas as your LTI provider.
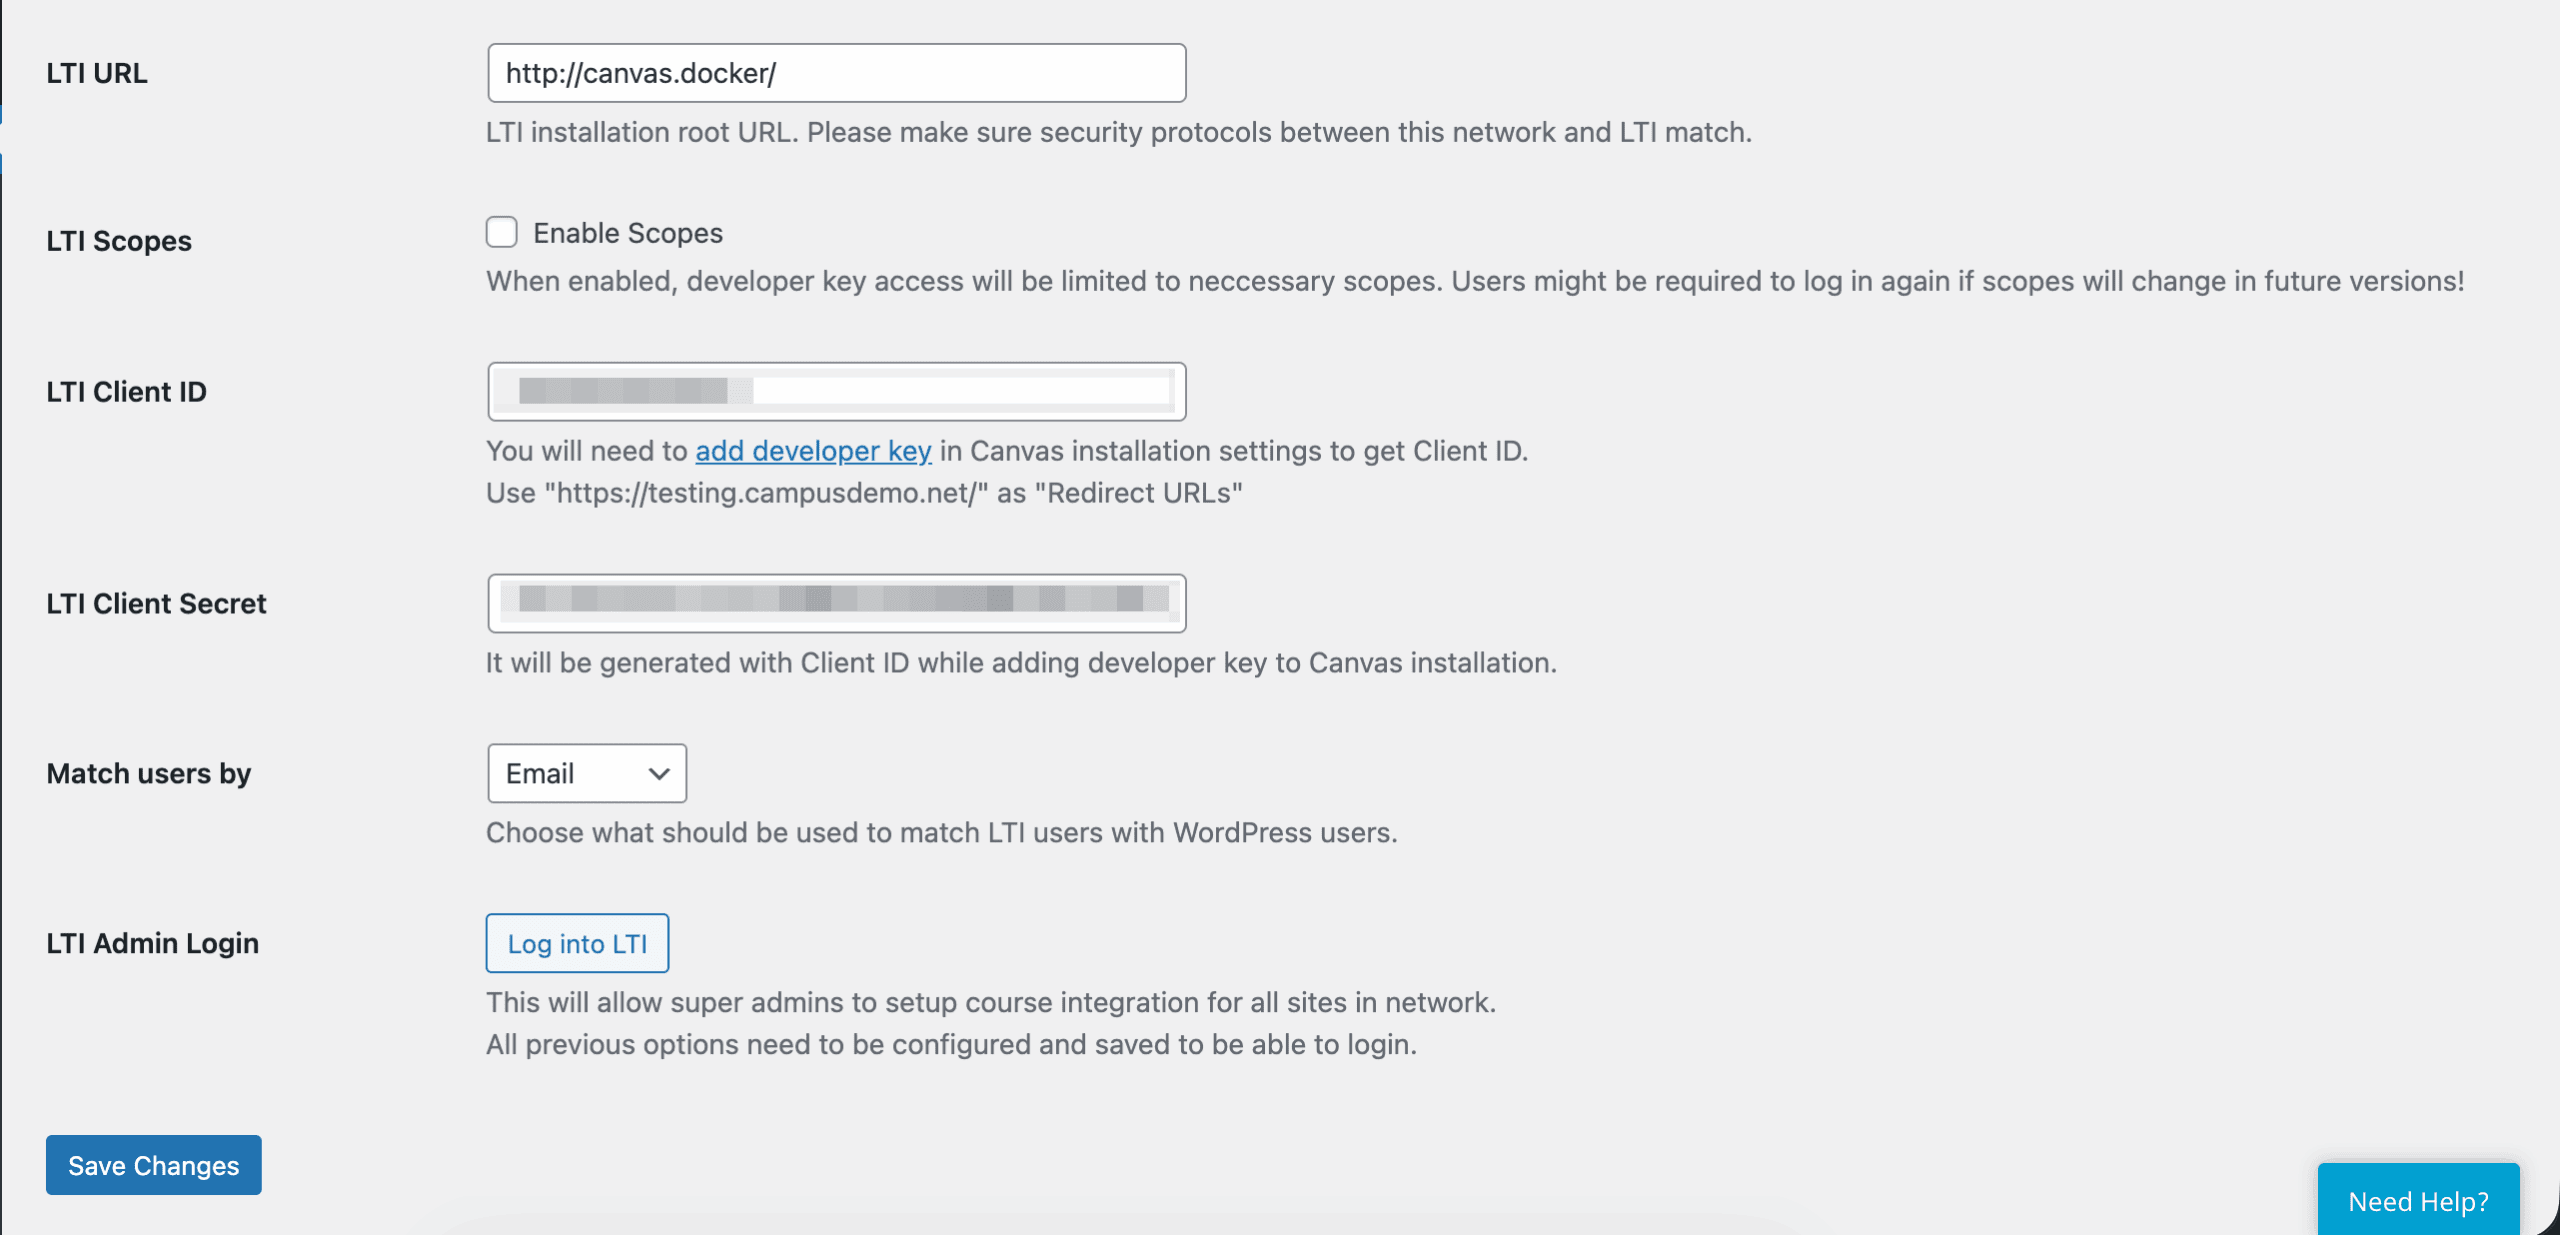
3. Add your LTI installation root URL, your Canvas LTI Client ID (obtained by adding a developer key in your Canvas Integration settings and use your network URL as the “Redirect URLs”, the Canvas LTI Client secret (automatically generated from your Client ID, select whether you want to match users by email or username (it must match their WordPress user account to be able to log in) and Log into LTI if you want super admin users on your CampusPress networks to help instructors set up the integration on their sites (super admins will be able to use a Course ID to set up the integration) then click Save Changes.
- Canvas LTI Scopes is optional and is not a requirement for Canvas LTI setup. Scopes allow you to limit the amount of data provided by Canvas. When enabled, you will see a list of scopes that will be needed. The developer key access will be limited to these necessary scopes.
Once these settings are configured, you can connect your course site to Canvas. If you haven’t created a course site on your CampusPress network you need to do this first.
Connect New Site To Canvas
You connect a new site to Canvas as follows:
1. Go to Plugins > All in the dashboard of the site you want to connect to Canvas.
- Skip steps 1 and 2 if the plugin has been network activated as the plugin is automatically activated on all sites on your CampusPress network.

2. Activate the LMS Integration plugin.
3. Go to Settings > LTI Integration in the site admin dashboard.

4. Click on Log into LTI.
Super admin view of LTI Integration page if the “Canvas Admin Login” option is enabled.

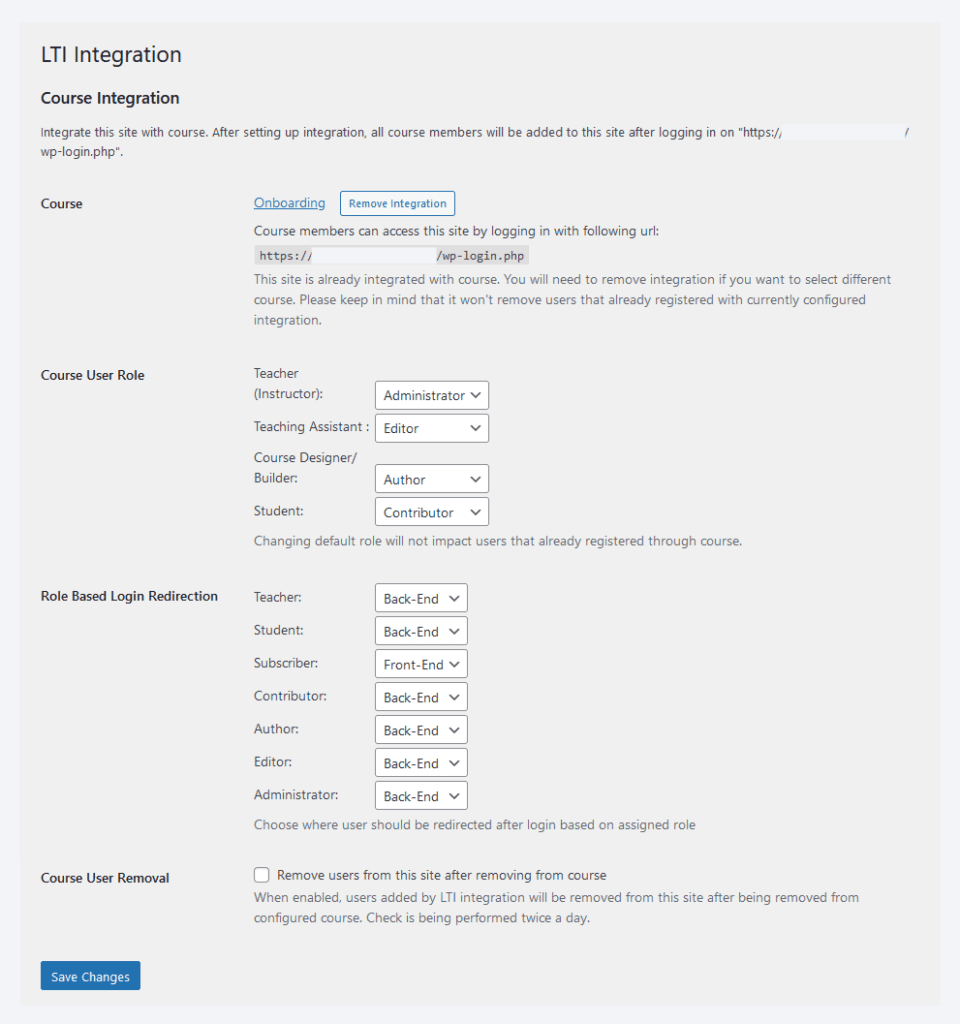
Site admins LTI settings page looks like this.

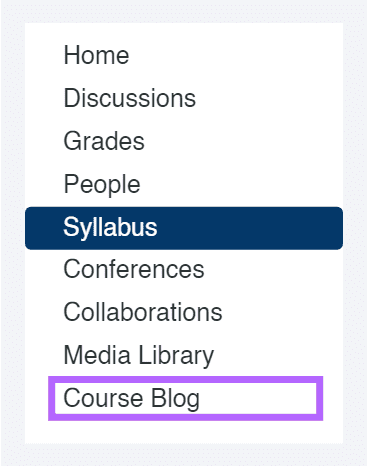
5. Once you are logged in you should see a list of your Canvas courses you have access to. Select the Canvas course you would like to connect to your CampusPress site.
6. Once connected a link to your CampusPress site should appear inside your Canvas course labelled “Course Blog.”
Configure Canvas Integration with Site
Once you’ve connected your Canvas course with your CampusPress site, you can adjust your settings to meet your needs.

- Role Based Login Redirection – used to control if users should be redirected to the Back-End (wp-admin or Dashboard) or Front-end of the CampusPress site upon login.
- Course User Removal – By default, students who leave a Canvas course aren’t removed from the CampusPress site. You have to manually remove these users unless you enable this option.
Student access
Once the Canvas integration is set up, the students must first go to their Canvas course within Canvas and click the Course Blog link in the menu. This redirect the students to the course site on CampusPress and assigns the students the user role as set in Settings > LTI Integration.
Once this is done, students can go directly to the CampusPress site without going through Canvas to access the course site.
Configure Brightspace
To use Brightspace as your LTI provider, you need to set up LMS Integration as follows:
1. Go to Settings > LTI Integration in the network admin dashboard.
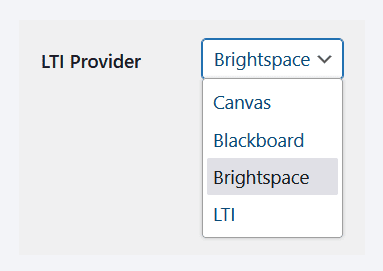
2. Under LTI Provider section, select Brightspace as your LTI provider.
3. Login to Brightspace at [brightspace_url]/d2l/lp/extensibility/oauth2 and create an app following the same steps as in this example.
- Application Name – Can be anything you want.
- Redirect URI – Your WordPress network URL.
- Scope – Copy the scope from the network admin LTI Integration page, under LTI Scopes, and paste it in the corresponding field.
4. On your LTI Integration screen, add your LTI installation root URL, along with your Brightspace LTI Client ID and LTI Client secret from the app you just created.

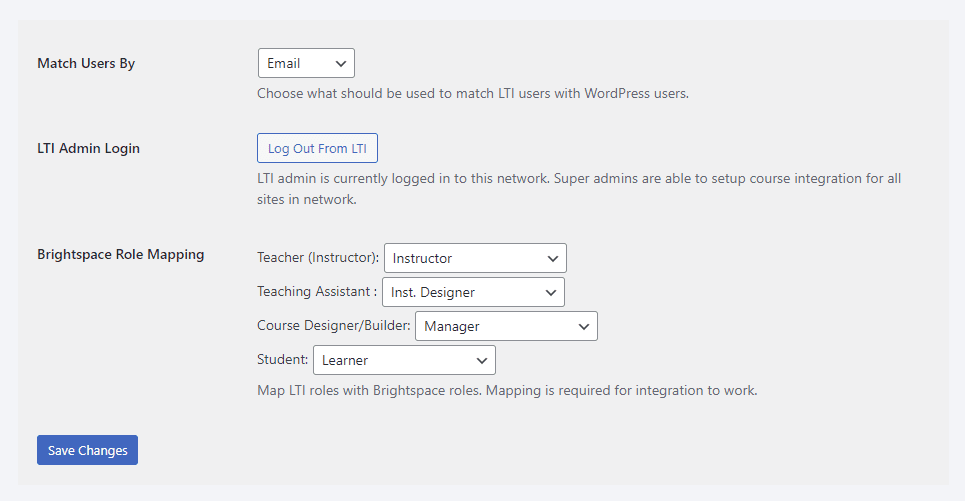
5. Select whether you want to match users by email or username (it must match their WordPress user account to be able to log in). Scroll down to the bottom and click Save Changes once you’ve done this.
6. Next, click Log into LTI if you want super admin users on your CampusPress networks to help instructors set up the integration on their sites (super admins will be able to use a Course ID to set up the integration) and map the Brightspace roles per your requirements. Click Save Changes again when you’re done.
Once these settings are configured, you can connect your course site to Brightspace. If you haven’t created a course site on your CampusPress network you need to do this first.
Connect New Site To Brightspace
You connect a new site to Brightspace as follows:
1. Go to Plugins in the dashboard of the site you want to connect to Brightspace.
2. Activate the LTI Integration plugin.
- Skip steps 1 and 2 if the plugin has been network activated as the plugin is automatically activated on all sites on your CampusPress network.
3. Go to Settings > LTI Integration in the site admin dashboard.

4. Click on Log into LTI.
Super admin view of LTI Integration page if the “LTI Admin Login” option is enabled.
Site admin view of LTI integration page looks like this.

5. Once you are logged in you should see a list of your Brightspace courses you have access to. Select the Brightspace course you would like to connect to your CampusPress site.
Configure Brightspace Integration with Site
Once you’ve connected your Brightspace course with your CampusPress site you can adjust your settings to meet your needs.
- Role Based Login Redirection – used to control if users should be redirected to the Back-End (wp-admin or Dashboard) or Front-end of the CampusPress site upon login.
- Course User Removal – By default, students who leave a Brightspace course aren’t removed from the CampusPress site. You have to manually remove these users unless you enable this option.
Brightspace student access
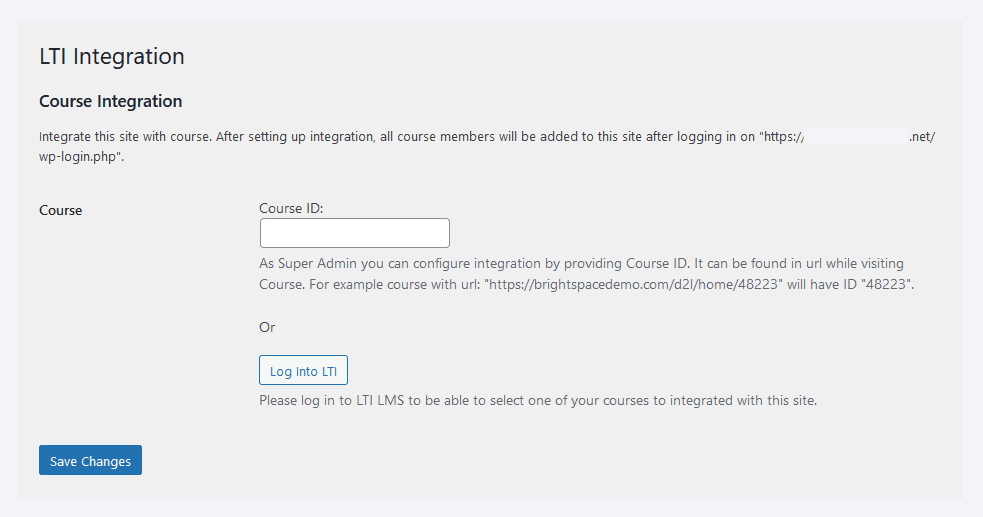
Once the Brightspace integration is set up, share the login URL of your CampusPress site with your students. You’ll find the login URL in your site LTI Integration settings under Course Integration.
When a student logs in with their email or username (per your selection in the network admin setup), they will be assigned the user role as you have set in Settings > LTI Integration on your course site.
Configure Blackboard
Please email us at contact@campuspress.com if you would like to connect with Blackboard so we can provide assistance.